AWS CodeCommit
Configure Connector
AWS CodeCommit is a fully-managed source control service that hosts secure Git-based repositories. It allows teams to collaborate on code in a secure and highly scalable ecosystem. It eliminates the need to operate your own source control system or worry about scaling its infrastructure.
Integrating AWS CodeCommit on StackGuardian
Follow the detailed steps below to integrate AWS CodeCommit with the StackGuardian platform, ensuring a secure and efficient collaboration environment for your development team. This guide will walk you through the process to configure your StackGuardian environment to work seamlessly with CodeCommit repositories.
Step 1: On AWS Console
- Log into the AWS Console: Start by signing into your AWS account.
- Navigate to IAM Dashboard:
- Go to your IAM dashboard.
- Click on "Users" followed by "Create User."
- Create a New User:
- Specify User Details: Enter a username (e.g., "CodeCommit_Username") and click 'Next.'
- Set Permissions: Choose "Attach Policies directly." In the permission policies search bar, type "codecommit" and select "awsCodeCommitReadOnly." Click 'Next.'
- Review and Create User: Check the details you've entered, optionally add tags, and then click on "Create User."
Create user on AWS
Step 2: Create a Public and Private SSH Key
- Generate SSH Key Pair:
- Open a terminal.
- Type
ssh-keygento generate a public/private RSA key pair. - Follow the prompts to save the key pair in the desired location.
No passphrase should be used.
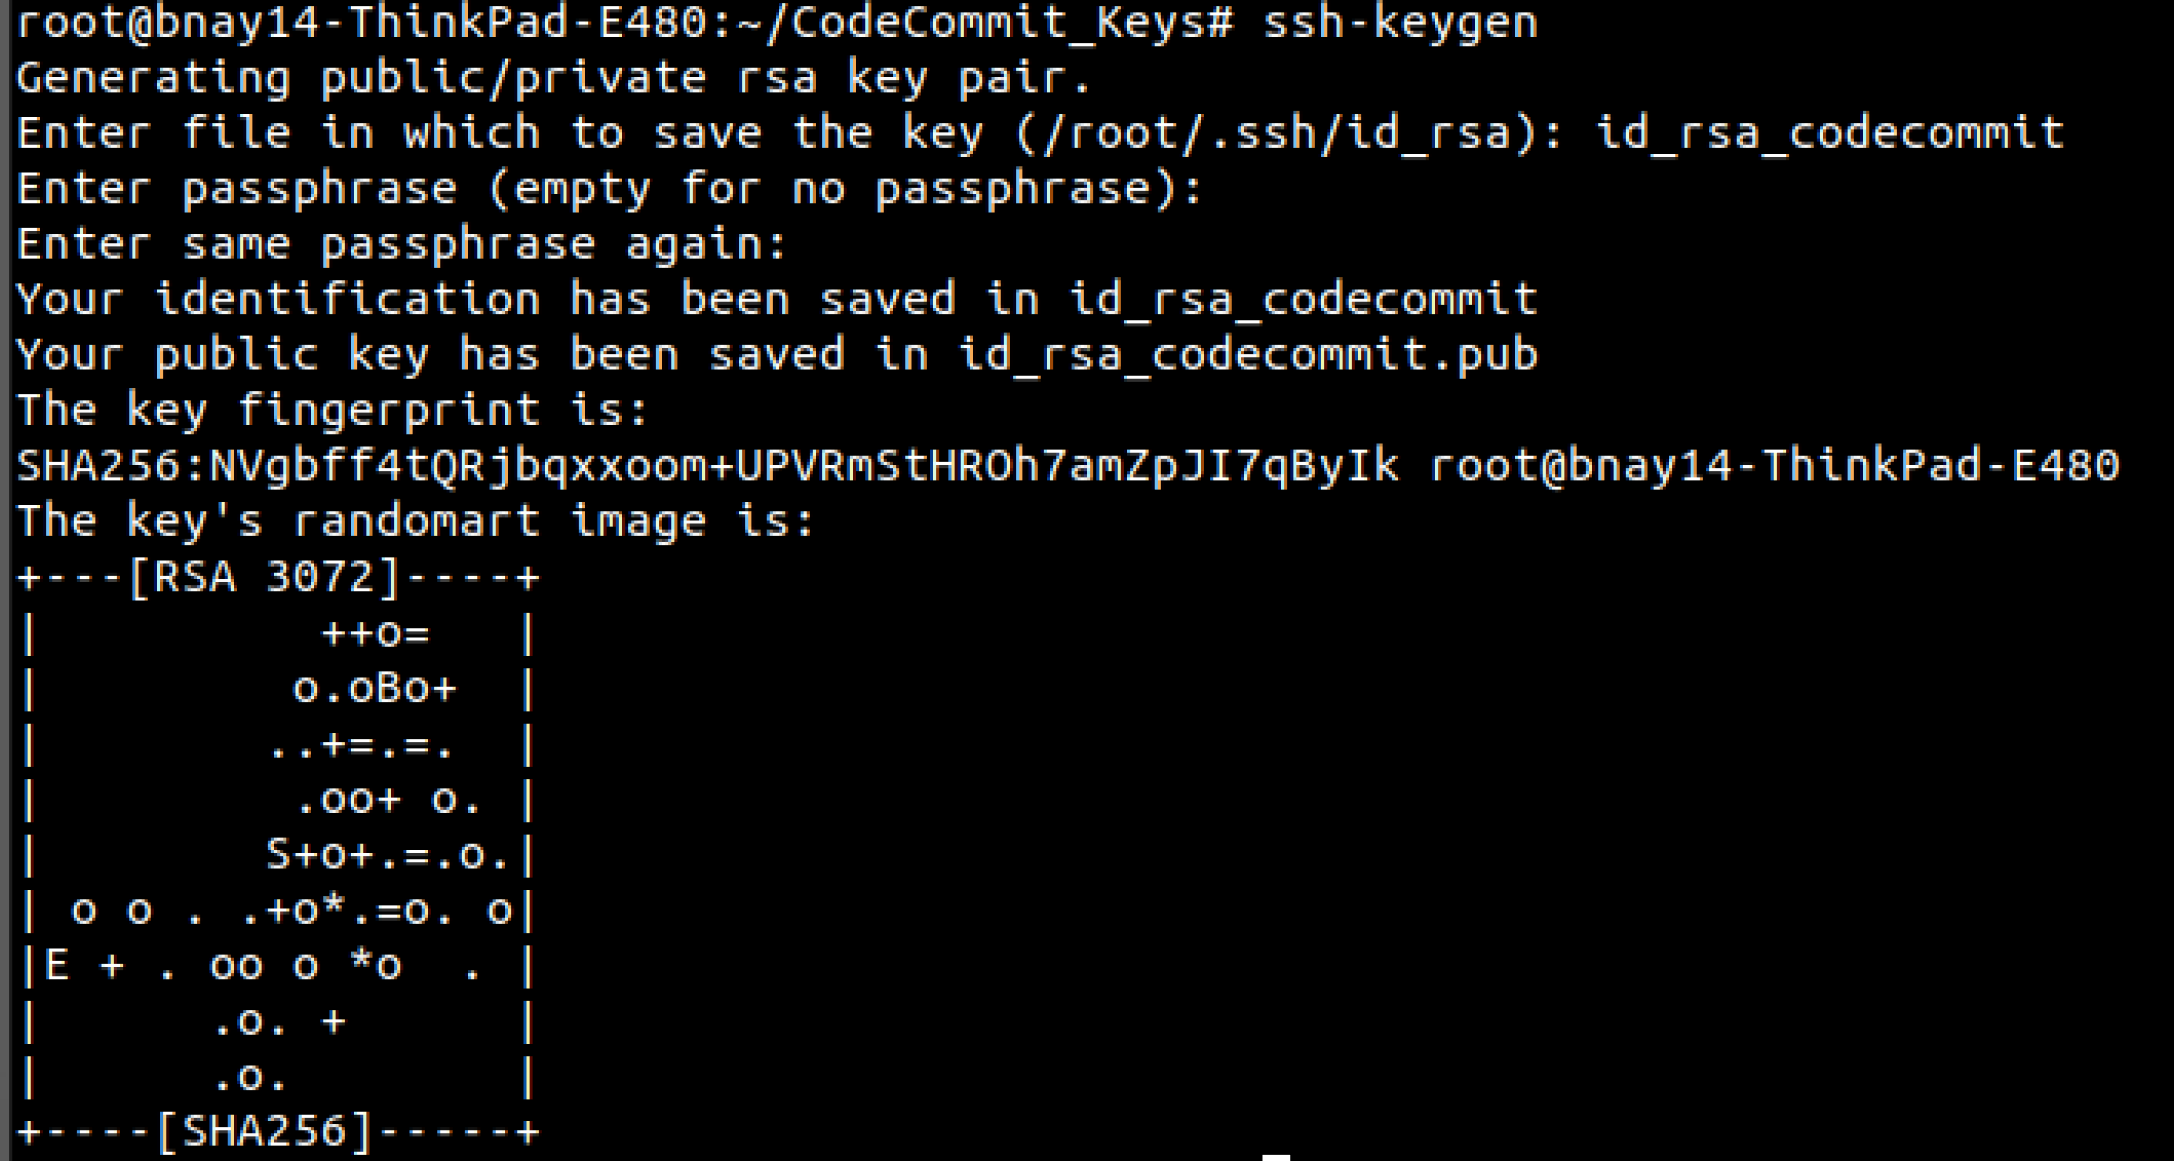
SSH Public/Private keys
- Upload Public SSH Key to AWS IAM:
- Return to the AWS IAM console, go to 'Users,' and select the user you created.
- Under the "Security Credentials" tab, find "SSH public keys for AWS CodeCommit" and click on "Upload SSH Public Key." Note: Public Key ends with .pub.
- Copy and paste the public SSH key you generated earlier into the modal and click on "Upload SSH Public Key."
- Note down the “SSH Key ID” = <SSH_KEY_ID>, you will need it later for the repository URL.
Upload and Store SSH Public Key
Step 3: Store private SSH key in StackGuardian
- Configure Connectors:
- In StackGuardian’s orchestrator, find Connectors > Vaults, Click on Create Vault Secret.
- Add a Secret name like "codecommit_privatekey." In the Secret Value field, paste the private SSH key from Step 2 and click 'Create.'
Store Private key in Vaults
Create Workflow on StackGuardian Platform
Step 1: Choose a Template or Repository
-
Navigate to
Orchestrator > Workflow Groups, click "Create Workflow," and select theterraformtype with Use Wizard (Preview). -
Choose source type Git Repository and select "Git Others (SSH, Secrets or Public Repo)"
-
Visit AWS's CodeCommit in the developer tools section. Under "source: Code Commit > Repositories," create a repository if not already done and copy the SSH URL =<git-url-repo-name>.
-
In the Git Repository, paste the Repository URL in the format:
ssh://<SSH_KEY_ID>@<git-url-repo-name>, where<SSH_KEY_ID>is the key generated after uploading the public SSH key, and<git-url-repo-name>is your repository name.Examples:
- EU Region:
ssh://APKA4V36KLB7H52IMNPE@git-codecommit.eu-central-1.amazonaws.com/v1/repos/aws-vpc - US Region:
ssh://APKA4V36KLB7H52IMNPE@git-codecommit.us-east-2.amazonaws.com/v1/repos/aws-vpc
Replace the region and SSH key ID with your specific values.
- EU Region:
-
Under the Authentication Method, select the private-key connector created in the vault before.
-
Explore the fields under Advanced Options dropdown and and click "Next".
Step 2: Runtime Environment
- Select a connector in the "Deployment Environment" and configure environment variables as needed.
- Runner Type: Choose the appropriate runner for flexibility and visibility.
- Under Terraform Configurations, enable options like
Automated Drift Check,Terraform Plan Approval, andSG Managed Backendfor efficient workflow management. - Click "Next" to proceed.
Step 3: Workflow Metadata
- Workflow Name: Provide a name for the workflow.
- Description and Tags: Add a description and tags for better identification and searchability, then click "Next".

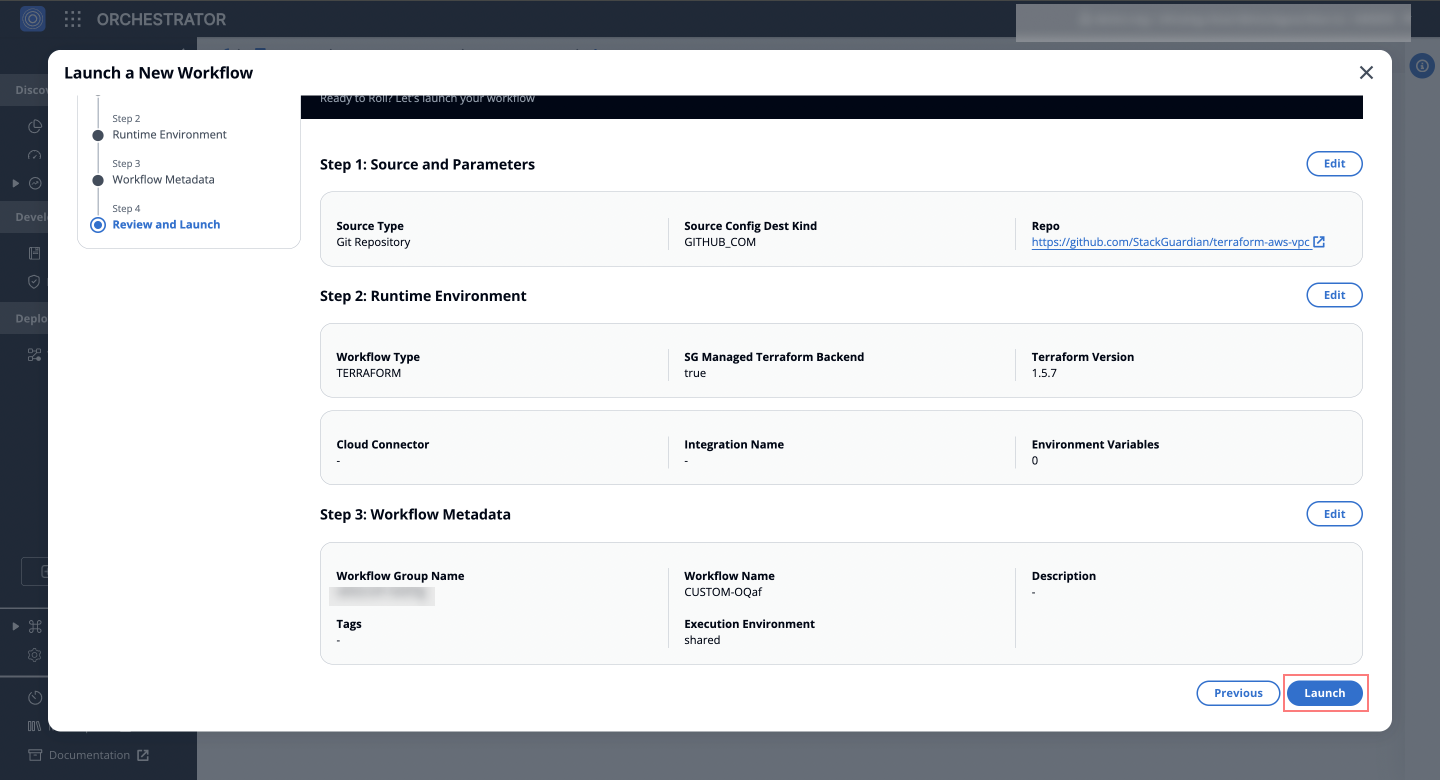
Step 4: Review & Launch
Review your settings carefully. If everything is correct, click "Launch" to create your workflow.