SSO using OIDC
StackGuardian facilitates a secure and streamlined access management process for Business and Enterprise clients by offering "Single Sign-On (SSO)" functionality. This enables IT administrators to centrally manage team access and ensures that sensitive information is kept secure. With SSO, users can access the app with ease through a single authentication source.
This guide provides instructions for setting up OIDC SSO with StackGuardian using Azure as the Identity Provider (IdP).
Step 1: Create a new App Registration in Microsoft Entra ID
- Sign in to the Azure portal.
- Open the "Microsoft Entra ID" service.
- Navigate to "App registrations" and then click "New registration".
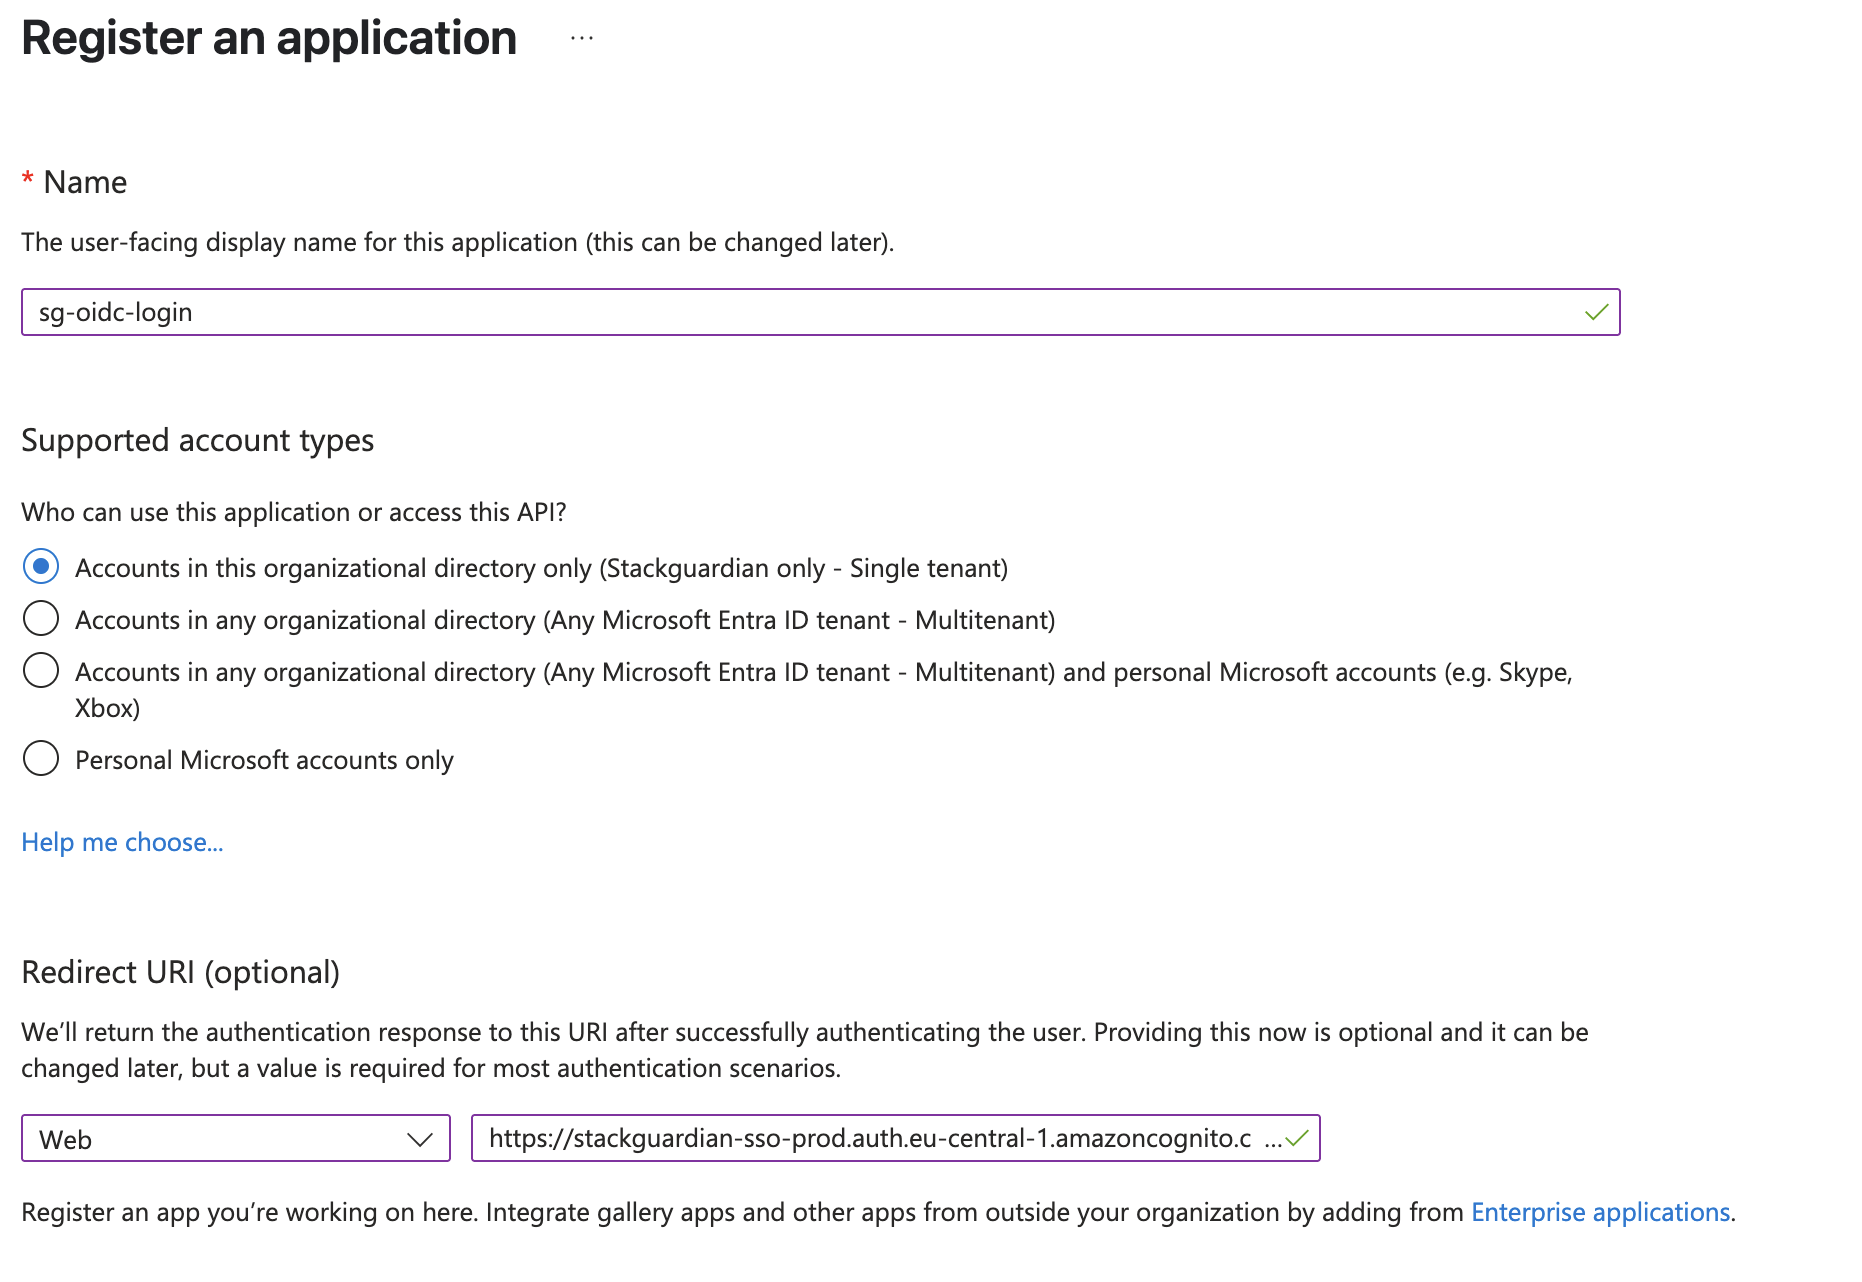
- Enter a name for your application and select the supported account types.
- Under redirect URIs, select "Web" and enter the appropriate value based on your deployment region:
For EU Region (Default):
https://stackguardian-sso-prod.auth.eu-central-1.amazoncognito.com/oauth2/idpresponse
For US Region:
https://stackguardian-sso-prod.auth.us-east-2.amazoncognito.com/oauth2/idpresponse
The redirect URI depends on your StackGuardian deployment region. Contact your StackGuardian representative if you're unsure which region your organization is deployed in.
Create new App registration
- Click "Register" to create the application.
- Copy and save the following details from the overview page of your new app registration. You will need to share them with your StackGuardian representative at the end of this guide.
- Application (client) ID
- Directory (tenant) ID
Step 2: Configure the App Registration Authentication
- From the new app registration that you just created, expand "Manage" on the left side menu and select "Authentication".
To add a secondary region (backup) for high availability:
Under "Platform Configuration" click on "Add URI" under Web Redirect URIs and enter the appropriate value based on your deployment region:
For EU Region:
https://stackguardian-prod-sso-alt.auth.eu-west-1.amazoncognito.com/oauth2/idpresponse
For US Region:
https://stackguardian-prod-sso-alt.auth.us-west-2.amazoncognito.com/oauth2/idpresponse
To configure Single Sign-Out, set the Front-Channel Logout URL based on your deployment region:
For EU Region:
https://stackguardian-sso-prod.auth.eu-central-1.amazoncognito.com/logout
For US Region:
https://stackguardian-sso-prod.auth.us-east-2.amazoncognito.com/logout
- Under "Implicit grant and hybrid flows" select "ID tokens".
- Click "Save" to save the changes.
Step 3: Configure the App Registration Token Configuration
- From the new app registration that you just created, expand "Manage" on the left side menu and select "Token configuration".
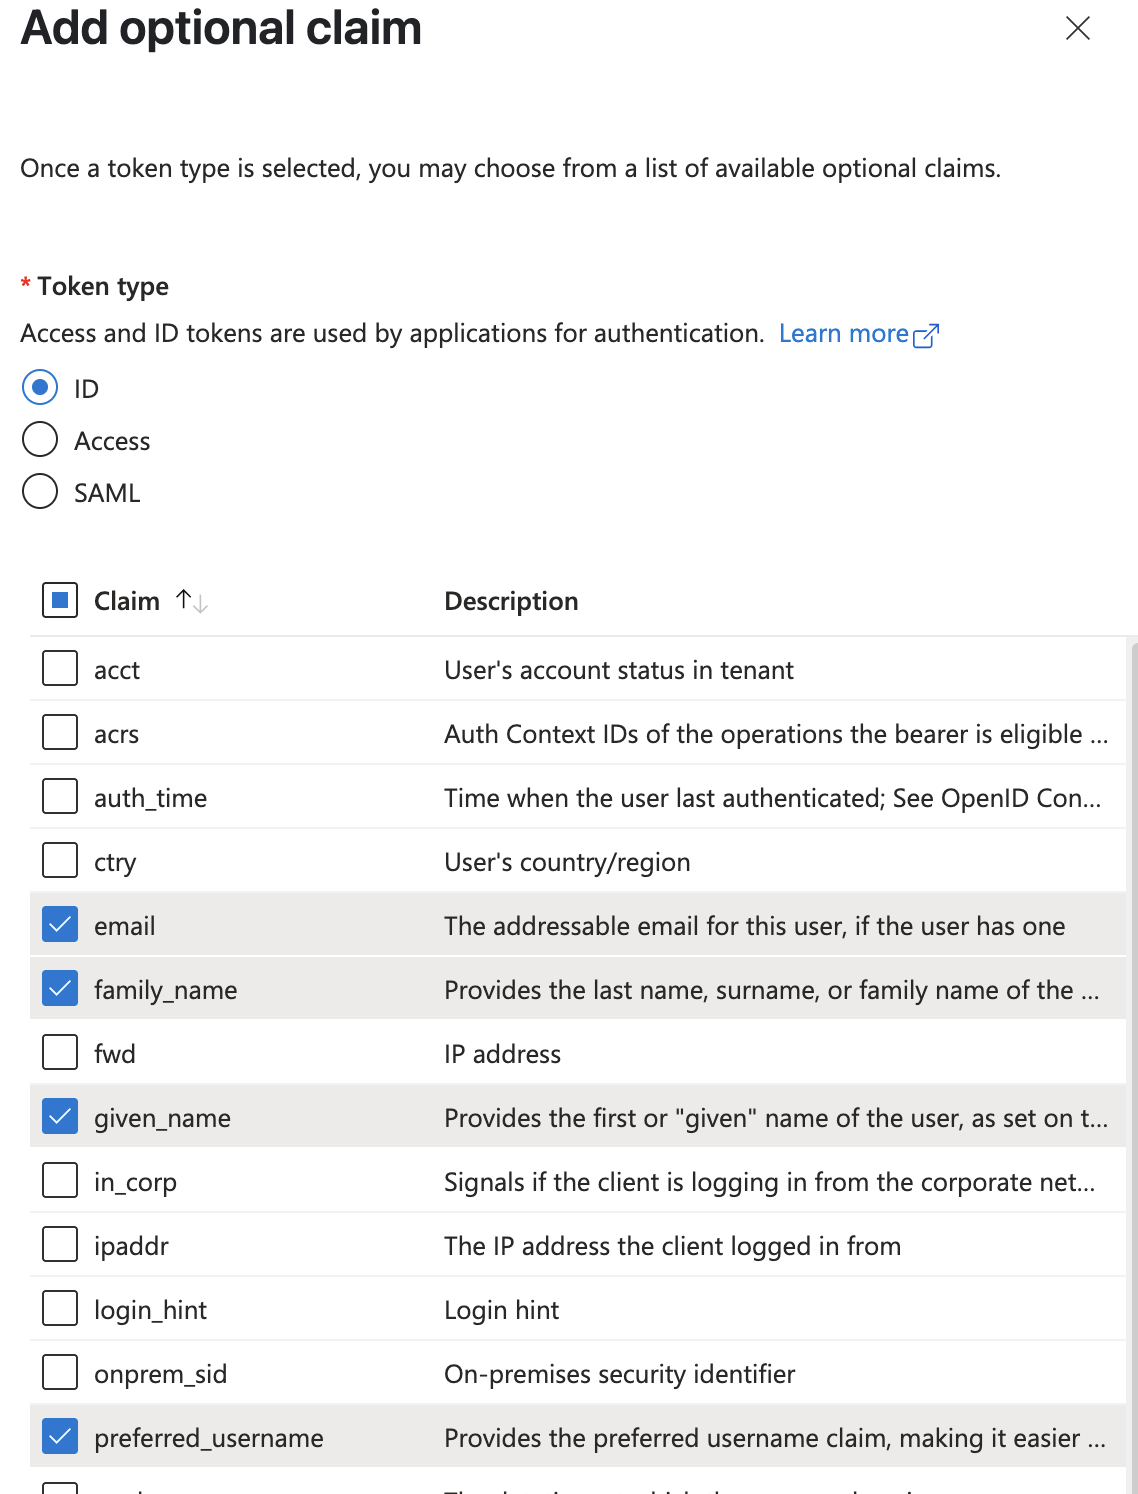
- Click on "Add optional claim".
- In the new popup that opens, select the "Token Type" as "ID".
- Select the following Claims:
- family_name
- given_name
- preferred_username
Add optional claims
- Click "Add" to add the claims.
- If you get a popup asking to turn on Microsoft Graph email, profile permission, check the box and click "Add".
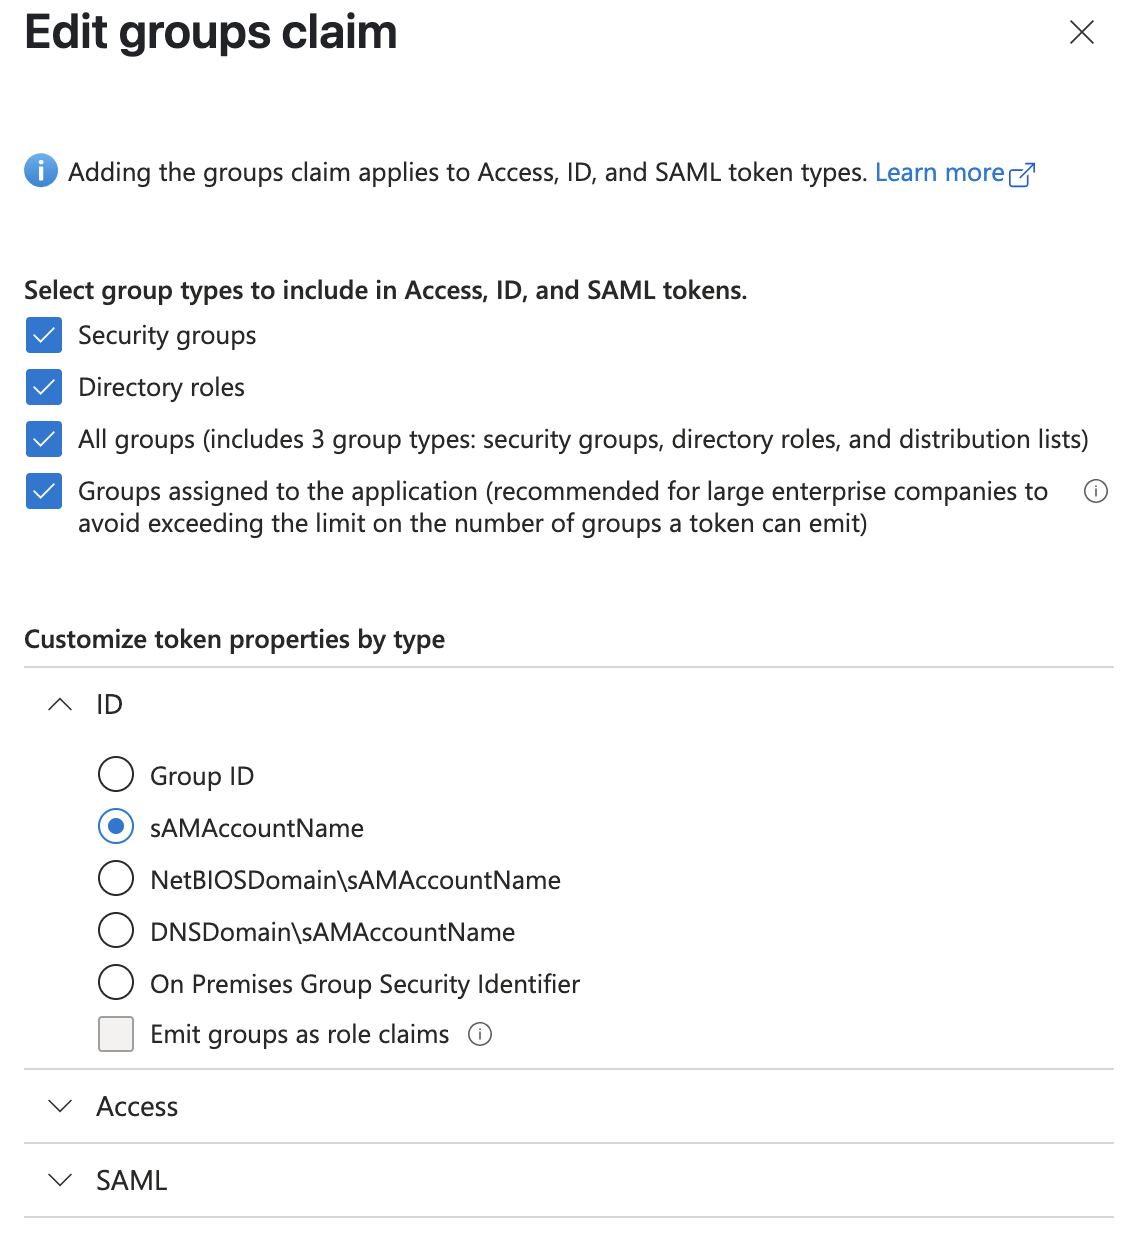
- Now click on "Add group claims"
- Select the checkboxes for the group types that you want to include in the tokens. If you are unsure, select all the boxes.
- Under "Customize token properties by type", expand "ID" and select "sAMAccountName".
Add group claims
- Click "Add" to add the group claim.
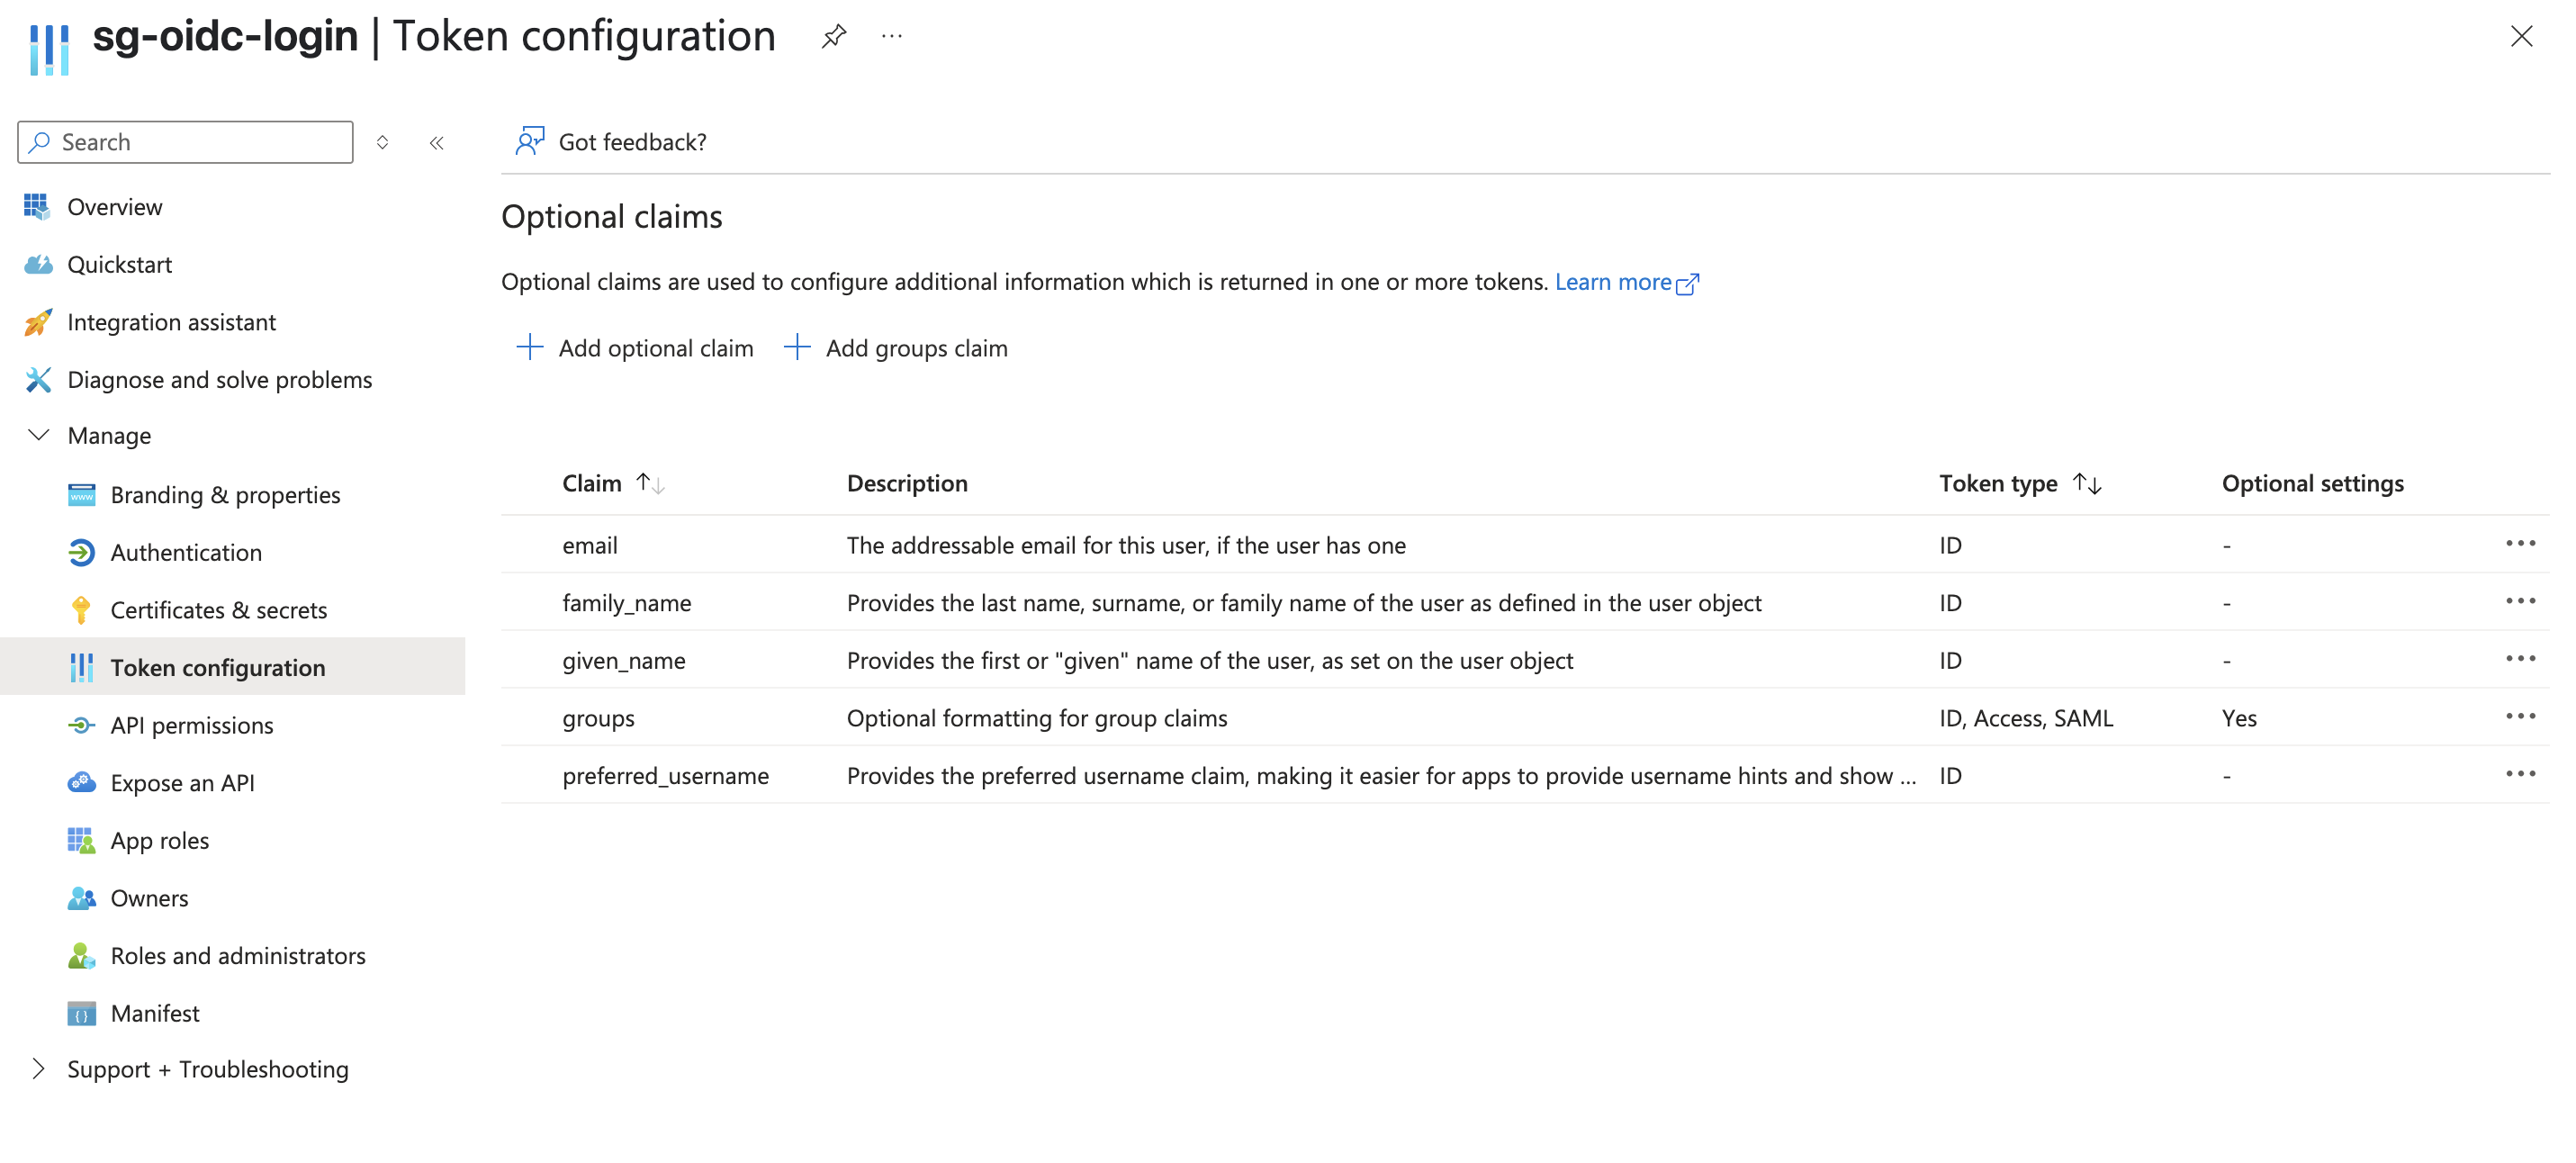
Final token configuration
Step 4: Create a new Client Secret for the App Registration
- From your app registration, expand "Manage" on the left side menu and select "Certificates & secrets".
- Click on "New client secret".
- Enter a description for your client secret and select your desired value for Expires. If you are unsure, select the default 180 days (6 months).
- Click "Add" to create the client secret.
- Copy the Value of the client secret and save it in a secure location. The value will not be visible again. You will need to share this with your StackGuardian representative at the end end of this guide.
Step 5: Assign users to StackGuardian
- Go to Microsoft Entra ID and select "Enterprise Applications".
- Select "All applications" and find your application in the list and open it. It will have the same name as your App registration.
- Expand the "Manage" section on the left side menu and select "Users and groups".
- Click on "Add user/group".
- Select the Users and Role on page that opens, and click "Assign"

Assign users and groups to your application
Step 6: Share the Client and Application Data with StackGuardian
- Share the following details that you gathered while following this guide with your StackGuardian representative:
- Directory (tenant) ID (From Step 1: Create a new app registration)
- Application (client) ID (From Step 1: Create a new app registration)
- Client Secret (From Step 4: Create a new Client Secret for the App Registration)
Once everything is successfully setup on StackGuardian, you will be notified to test the connectivity.
Inviting SSO Users or Groups
To invite SSO users or groups, use the following API endpoint. The process involves sending a payload with the user or group information. Below is the format of the payload:
API endpoint: https://api.app.stackguardian.io/api/v1/orgs/{org}/invite_user/
{
  "userId": "<sso-group-name>/user.email@stackguardian.io",
  "resendInvite": false,
  "role": "ADMIN"
}
- Replace "<sso-group-name>" with the appropriate SSO group name from the dropdown options visible to the user.
- Replace "user.email@stackguardian.io" with the actual email address of the user.
You can refer to the API documentation here for more details on how to use the endpoint.