Audit logs
Overview
StackGuardian’s Audit Logs provide a user-friendly and consistent centralised stream record of all user and system activities across the platform, as well as monitor activity, investigate issues and ensure compliance with security.
Audit Logs ensure that organizations can track who did what, when, and how, while maintaining strong access control. Only organization administrators have full visibility and management of Audit Logs, ensuring sensitive activity data remains protected.
Key Features
-
Retention Time
Logs are only retained for 30 days. Audit logs older than 30 days are permanently deleted and cannot be recovered.

-
Access & Permissions
This section explains who can access Audit logs and what each user role is allowed to do within StackGuardian.
-
Admins
- Have full access to Audit Logs.
- Can view, filter, export Audit logs and configure Webhooks.
-
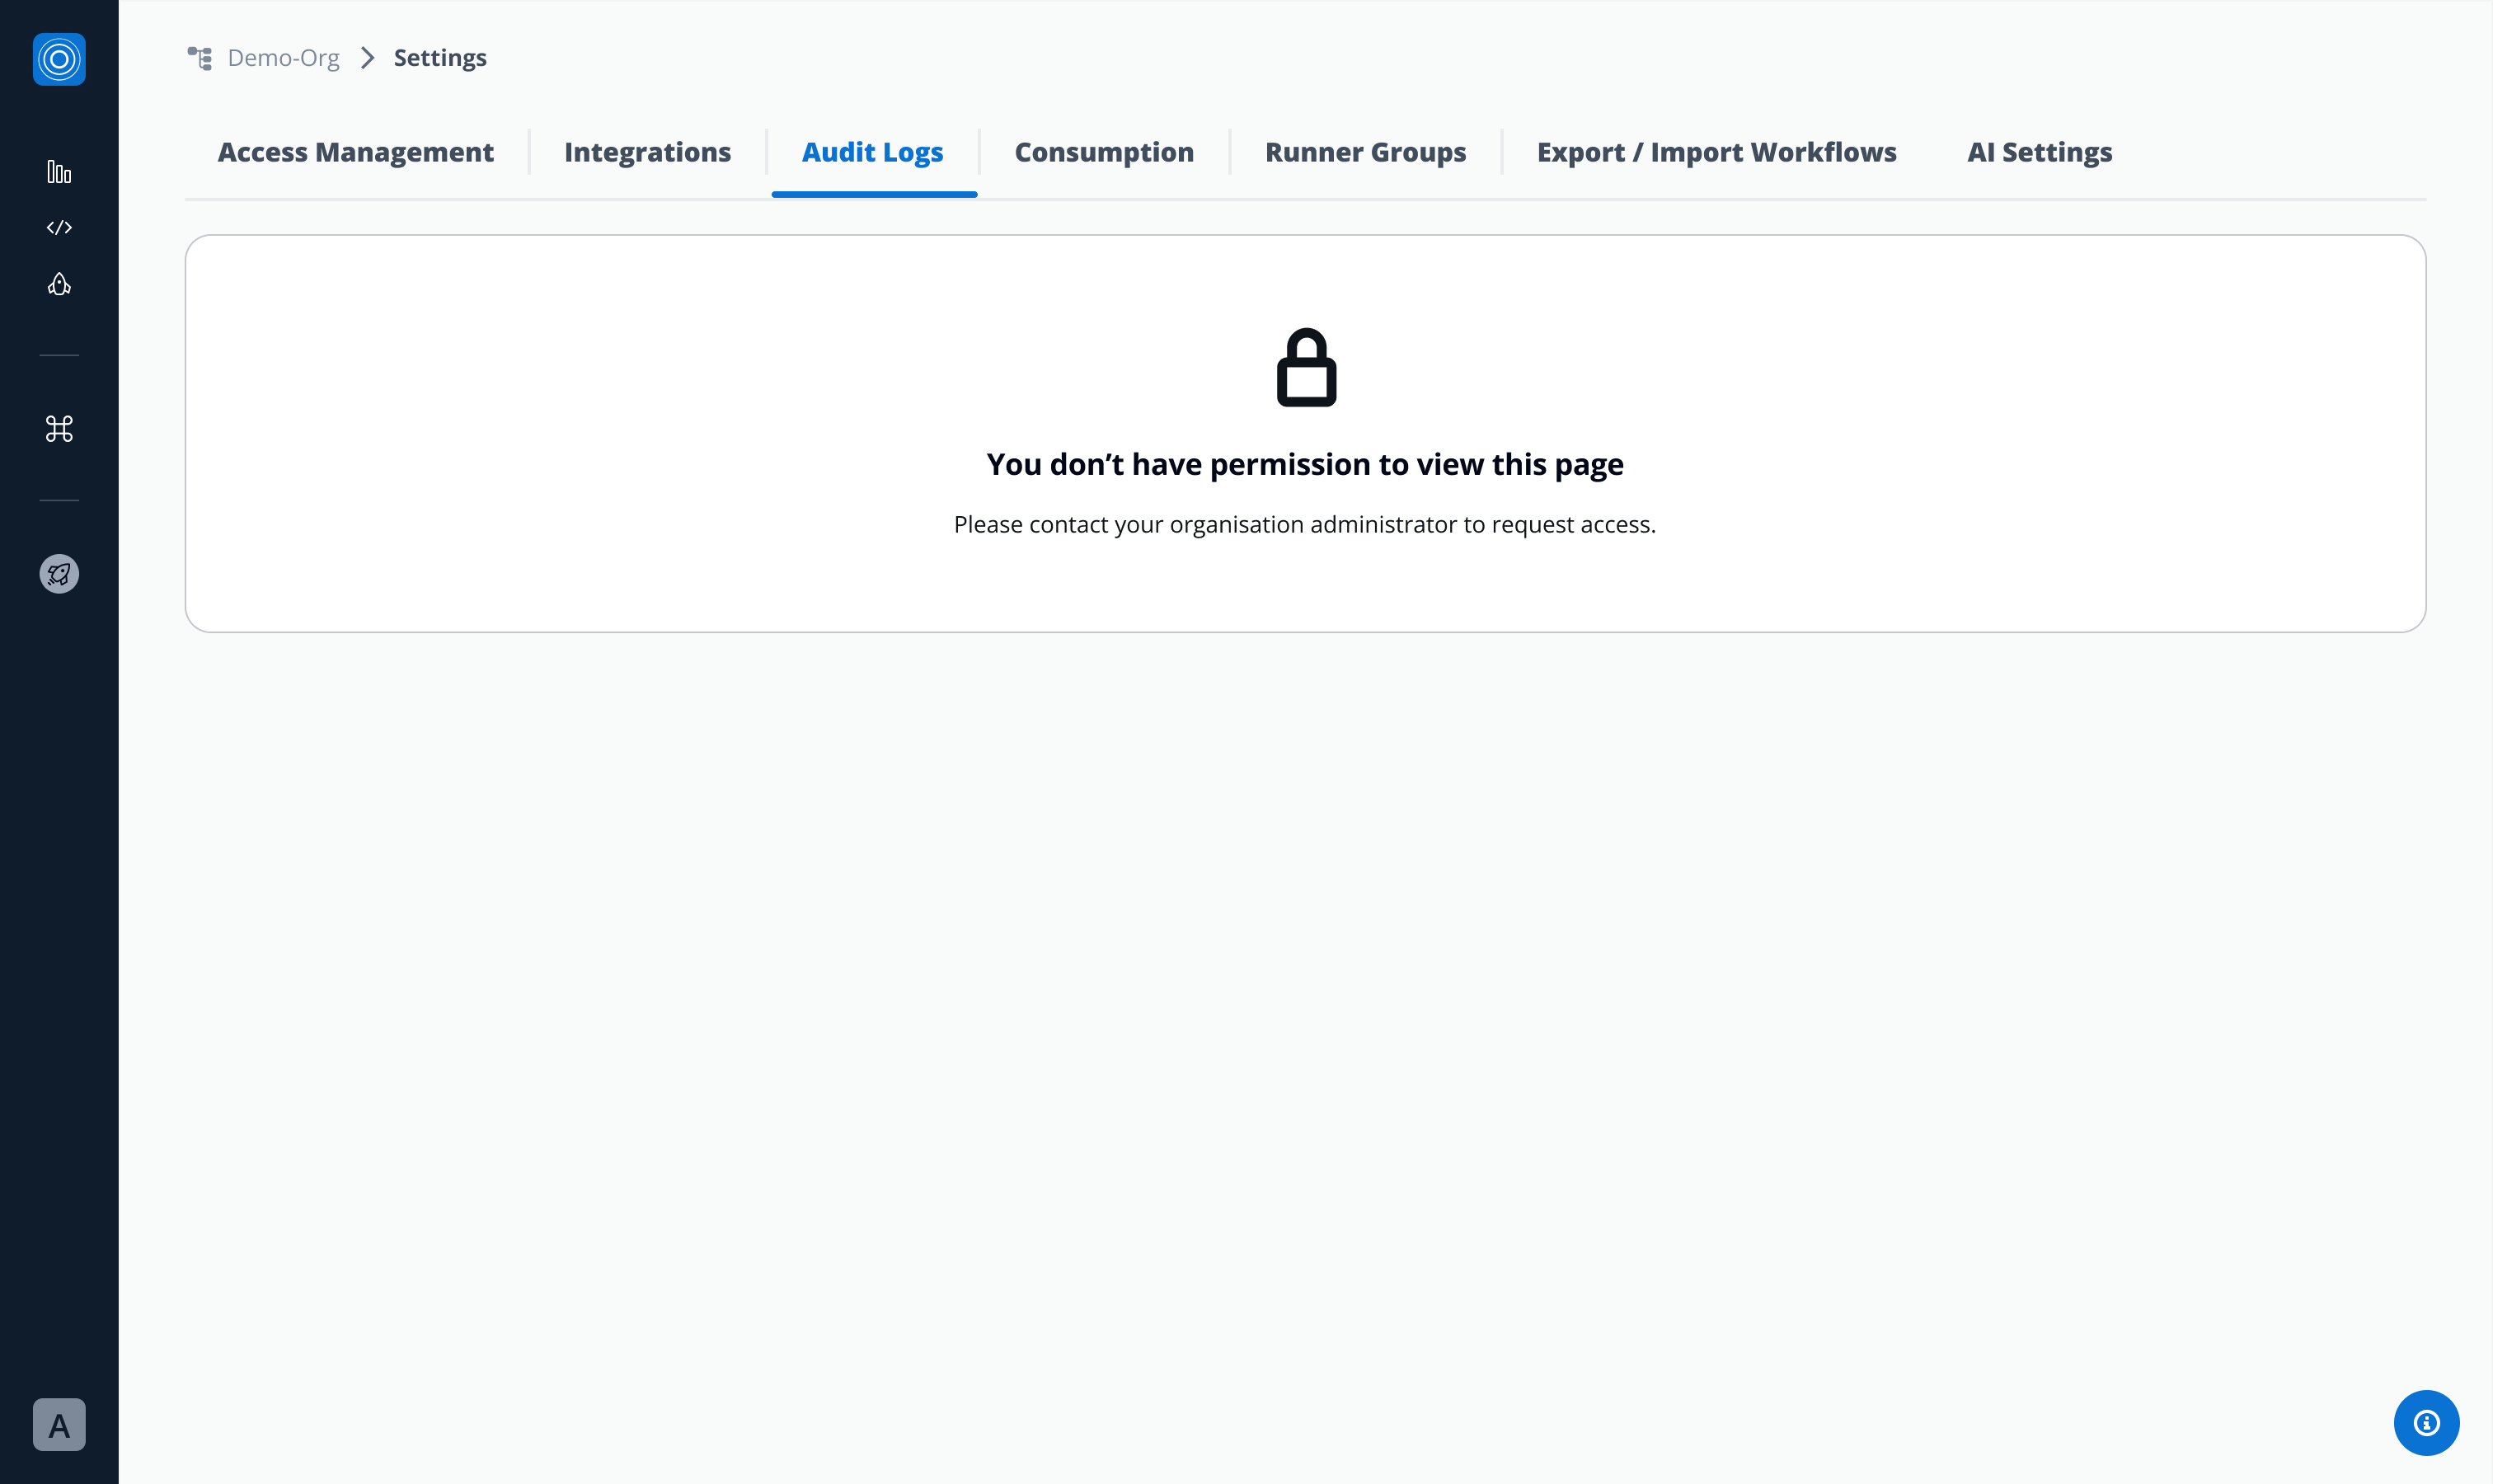
Regular Users
- Do not have access by default.
- If granted access by an admin:
- Can view, filter, and export Audit logs.
- Cannot create or configure Webhooks.
Regular user with no access:
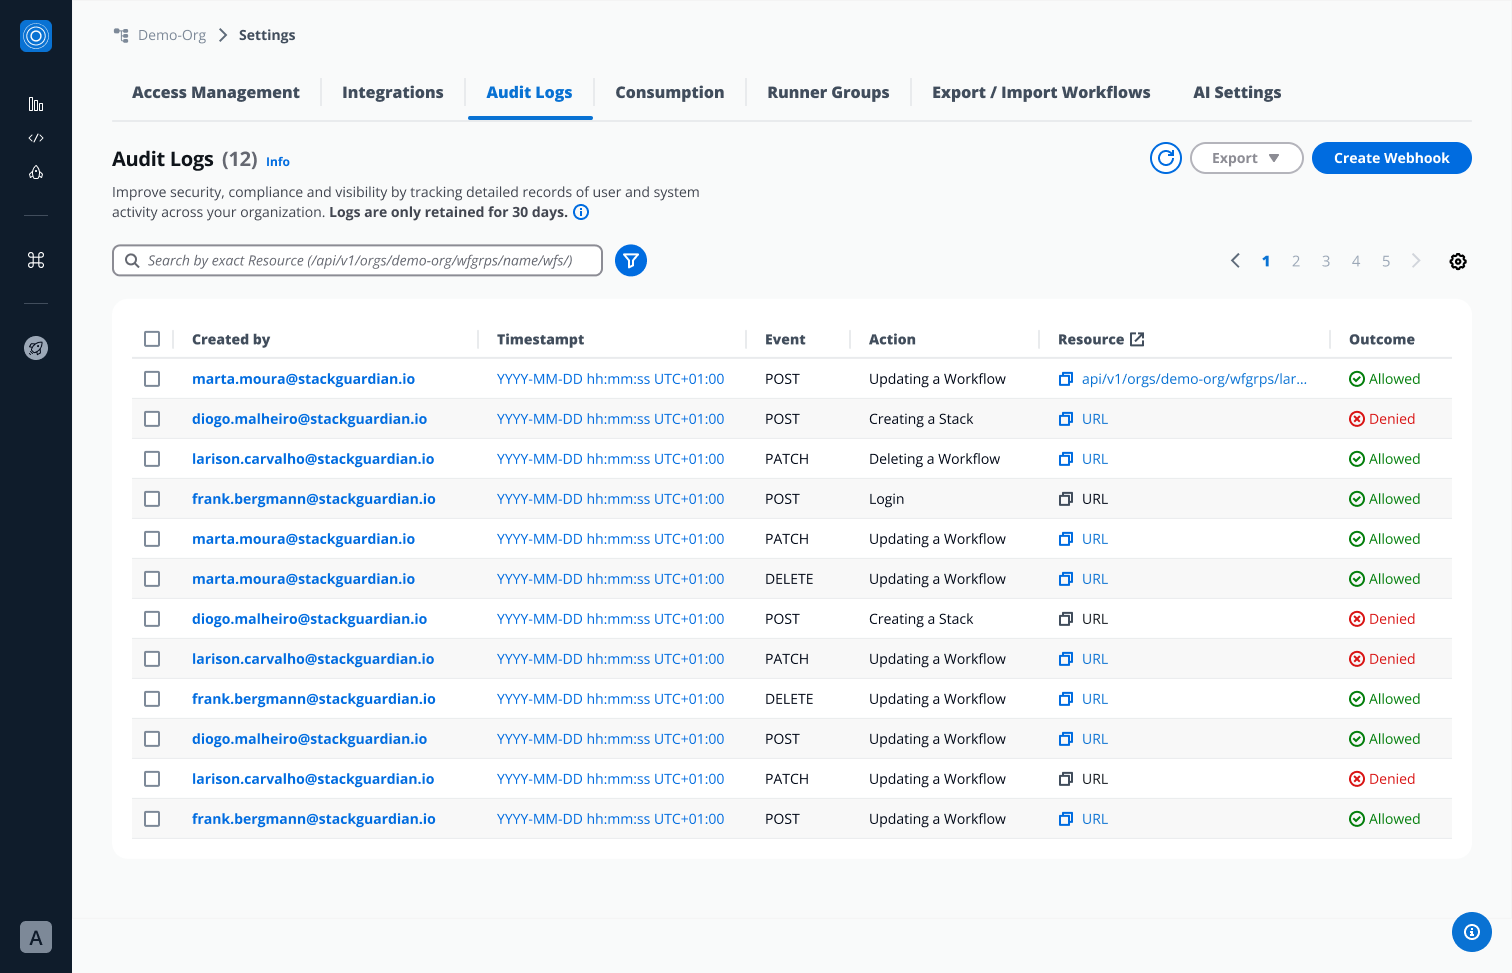
Regular user, after admins permission granted:
-
-
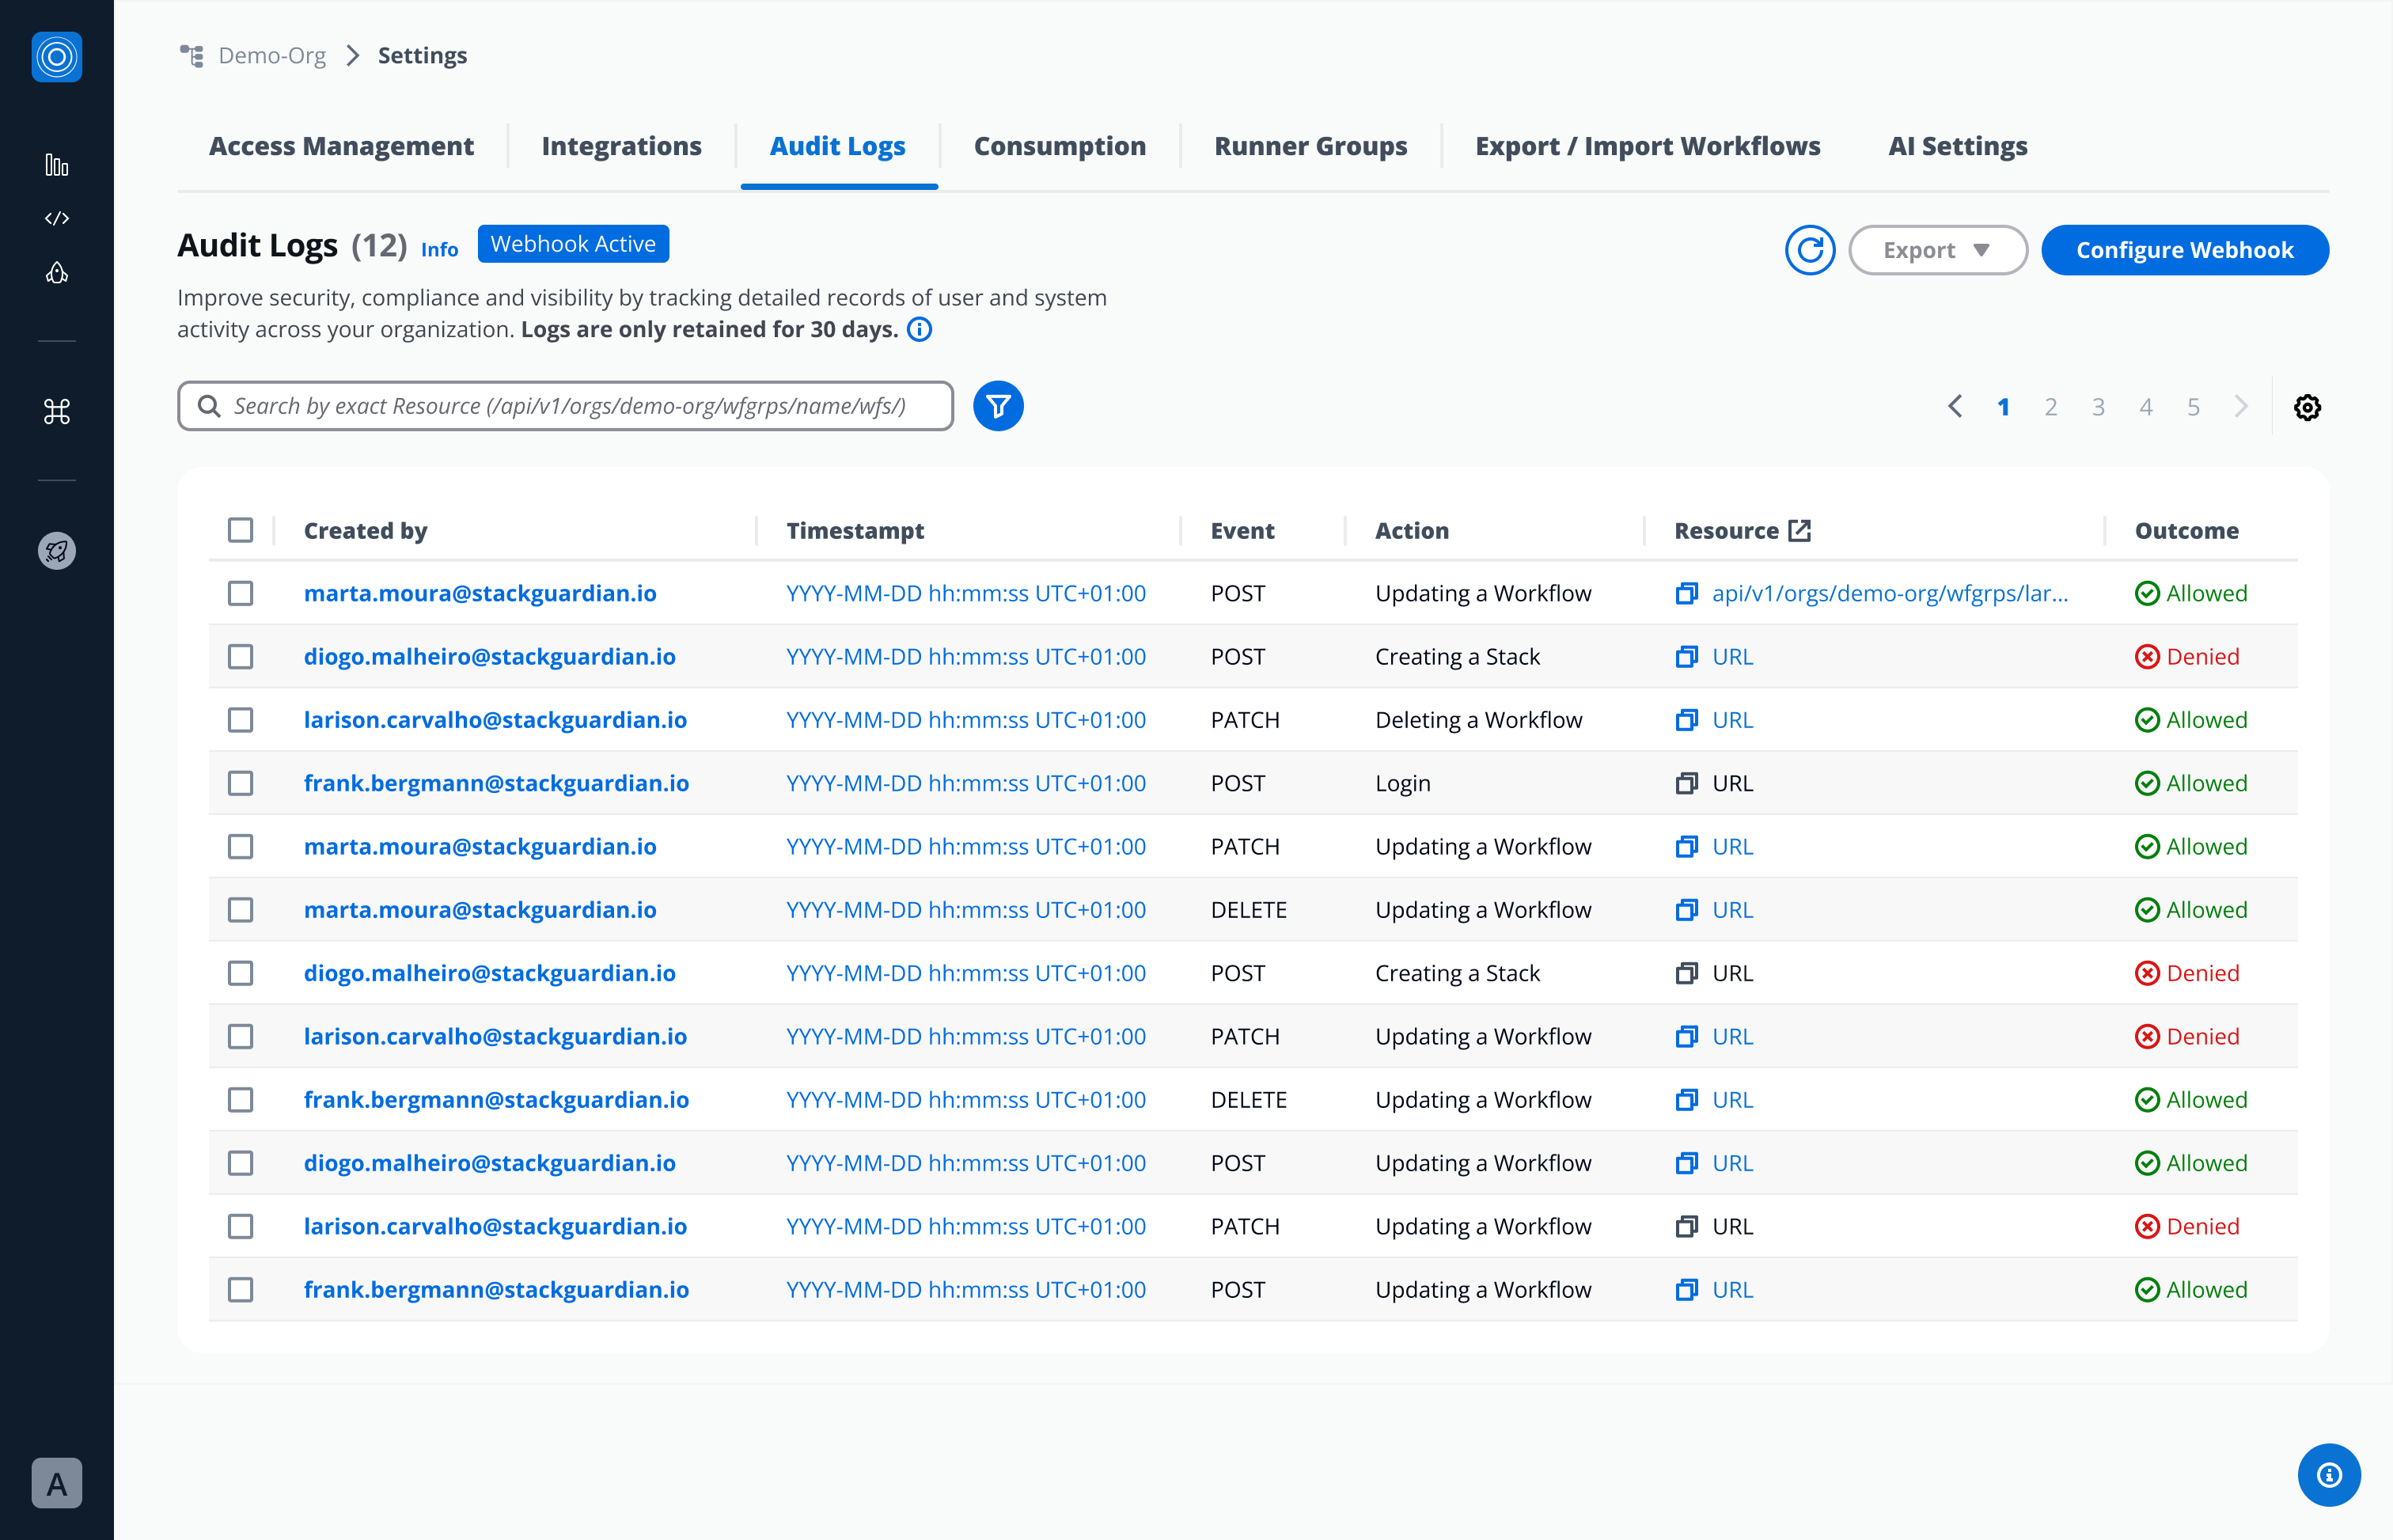
Audit Logs List View Table
Stack Guardian automatically records all user, admin and system activities.
- Each log entry includes:
- Created by → Who performed the action (email)
- Timestamp → When the action occurred (YYYY-MM-DD hh:mm:ss UTC+01:00)
- Event type → POST, PATCH, DELETE
- Action → What was done (e.g., template activated, policy updated)
- Resource Affected → What was affected, URL of the affected resource
- Outcome → If it was Allowed or Denied
From this view, users can:
- Click Created by → open detailed Audit Log view.
- Click “Timestamp” from a specific Audit Log → triggers Pop over with more timestamp information (relative time).
- Copy Resource URL
- Click Resource (when applicable)- lead user to a specific end point in a new tab.
- Bulk-select multiple Audit Logs → perform mass Export.
- Single-select an Audit Log → Export.
- Each log entry includes:
-
Detailed Audit Log View
When you click on a specific Audit Log entry, a detailed modal displays:
-
Meta:
- Created by: Who performed the action (email)
- Timestamp: When the action occurred (YYYY-MM-DD hh:mm:ss UTC+01:00)
- Event type: POST, PATCH, DELETE
- Action: What was done (e.g., template activated, policy updated)
- Resource Affected: What was affected, URL of the affected resource
- Outcome: Allowed or Denied
- IP Address: Origin of the request
-
Request Payload: Body of a request (JSON file)
-
Response Payload: Body of a response (JSON file)
Users can copy Request and Response payloads

-
-
Filters & Search
The Filter Panel (accessible via filter icon) enables:
- Date and Time Range → Relative/ Absolute (maximum sequence of 10 days)
- Event Type → POST, PATCH, DELETE
- User → List of all users that appear in Audit Logs
- Outcome → Allowed, Denied
Note: The Date and Time Range filter must be selected before other filters can be applied. ****
Users can search by exact Resource:
-
Export
Users can select one or multiple Audit Logs and export into:
- JSON file
- CSV file
Webhook
Admins can create and configure webhook to stream logs in real time to external SIEM systems or other monitoring tools. Whenever a new log entry is generated, the webhook is automatically triggered, ensuring instant delivery to the configured external systems.
Configuration
- Endpoint URL - The URL where you would like to receive the audit logs payload.
- Secret - StackGuardian signs each outgoing webhook request with an HMAC SHA-256 signature using this secret value as the key. This allows you to verify that the request truly originated from StackGuardian and that it's payload has not been tampered with in transit. The signature is sent in the
X-Sg-Signature-256header. For example:X-Sg-Signature-256: sha256=<signature>infoThe Secret parameter is optional but recommended and is used to validate the received payload. You can learn more about it in the Validating Webhook Deliveries Using the Webhook Secret section.
- Headers (Optional)
- Key - Name of the header
- Value - Value of the header
Create Webhook
Click on Create Webhook button, fill all the required configuration details and you are all set to go.
Webhook Payload Example
When StackGuardian sends a request to your configured endpoint, the request body contains details about the event that occurred. To help you understand what to expect, below are some sample payloads.
Example: User Sign-In (SG_SIGN_IN)
{
  "timestamp": 1757410496427,
  "message": {
    "id": "b831d3a7-e450-4acc-b524-78c8c17768a2",
    "date_created": "2025-09-09T09:34:56",
    "action": "SG_SIGN_IN",
    "actor": {
      "type": "user",
      "user": {
        "principalEmail": "user@stackguardian.io"
      }
    },
    "effect": "Deny",
    "sourceIp": "2106:9140:11:e7e:8c35:afe9:d781:aefb",
    "timestamp": 1757410496427,
    "user_name": "0067e754-6701-4072-9530-da736f5b1fde",
    "user_pool_id": "region",
    "company": null,
    "new_device_used": false
  }
}
Example: Deny action
{
  "timestamp": 1757411994648,
  "message": {
    "id": "b831d3a7-e450-4acc-b524-78c8c17768a3",
    "date_created": "2025-09-09T09:59:54",
    "action": "PATCH/api/v1/orgs/demo-org/wfgrps/policy-resolution-test/wfs/failing-aws-s3-demo-website-5swa/",
    "actor": {
      "type": "user",
      "user": {
        "principalEmail": "user@stackguardian.io"
      }
    },
    "effect": "DENY",
    "sourceIp": "158.1140.117.0",
    "timestamp": 1757411994
  }
}
Example: Delete action
{
  "timestamp": 1757412835493,
  "message": {
    "id": "b831d3a7-e450-4acc-b524-78c8c17768a4",
    "date_created": "2025-09-09T10:13:55",
    "action": "DELETE/api/v1/orgs/demo-org/wfgrps/workflow-delete-test/wfs/terraform-aws-vpc-stripped-new-cot6/",
    "actor": {
      "type": "user",
      "user": {
        "principalEmail": "user@stackguardian.io"
      }
    },
    "effect": "Allow",
    "sourceIp": "60.243.160.178",
    "timestamp": 1757412835,
    "request_body": {},
    "request_method": "DELETE",
    "query_params": {},
    "response": "Workflow terraform-aws-vpc-stripped-new-cot6 deleted"
  }
}
Example: POST action
{
  "timestamp": 1757412855196,
  "message": {
    "id": "b831d3a7-e450-4acc-b524-78c8c17768a5",
    "date_created": "2025-09-09T10:14:15",
    "action": "POST/api/v1/orgs/demo-org/wfgrps/workflow-delete-test/wfs/terraform-aws-vpc-stripped-new-d7kw/wfruns/",
    "actor": {
      "type": "user",
      "user": {
        "principalEmail": "user@stackguardian.io"
      }
    },
    "effect": "Allow",
    "sourceIp": "60.243.160.178",
    "timestamp": 1757412855,
    "request_body": {
      "TerraformAction": {
        "action": "destroy"
      },
      "EnableChaining": true
    },
    "request_method": "POST",
    "query_params": {},
    "response": {
      "OrgId": "/orgs/demo-org",
      "SubResourceId": "/wfgrps/workflow-delete-test/wfs/terraform-aws-vpc-stripped-new-d7kw/wfruns/ov9wr8nru04v",
      "CreatedAt": 1757412854960,
      "Comments": {
        "1757412854960": {
          "comment": "Workflow Run initiated",
          "createdBy": "user@stackguardian.io"
        }
      },
      "Statuses": {
        "pre_0_step": [
          {
            "name": "QUEUED",
            "createdAt": 1757412854960
          }
        ]
      },
      "LatestStatusKey": "pre_0_step",
      "ContextTags": {}
    }
  }
}
Example: PATCH action
{
  "timestamp": 1757411989818,
  "message": {
    "id": "4e35d725-6e0b-4d58-a5e3-d72e48a393c2",
    "date_created": "2025-09-09T09:59:49",
    "action": "PATCH/api/v1/orgs/demo-org/roles/patch-wf-bugfix/",
    "actor": {
      "type": "user",
      "user": {
        "principalEmail": "user@stackguardian.io"
      }
    },
    "effect": "Allow",
    "sourceIp": "158.140.167.0",
    "timestamp": 1757411989,
    "request_body": {
      "AllowedPermissions": {
        "PATCH/api/v1/orgs/demo-org/wfgrps/<wfGrp>/stacks/<stack>/wfs/<wf>/": {
          "name": "UpdateStackWorkflow",
          "paths": {
            "<wfGrp>": [".*", ".*/.*"],
            "<stack>": [".*", ".*"],
            "<wf>": [".*", ".*"]
          }
        }
      }
    }
  }
}
Configure/ Disable Webhook:
Click on Configure Webhook button and modify or disable Webhook.

Validating Webhook Deliveries Using the Webhook Secret
When you configure a webhook in StackGuardian with a secret (optional but recommended), every delivery sent to your endpoint will include a signature header:
X-Sg-Signature-256: sha256=<HMAC>
This signature allows you to verify that:
- The request came from StackGuardian, not an attacker.
- The payload was not tampered with in transit.
Validating webhook signatures is strongly recommended before you process any incoming webhook data. Doing so prevents wasted processing on spoofed requests and protects against man-in-the-middle attacks.
1. Configure Your Webhook Secret
- Create a Vault Secret in StackGuardian to store your secret token.
- Go to your organization setting’s Audit Logs Tab → Create/Configure Webhook.
- For the Secret field, select the secret you created from the dropdown and save your changes.
2. How StackGuardian Signs Requests
- StackGuardian takes the raw audit log webhook payload.
- It computes an HMAC-SHA256 digest using your secret token as the key.
- The computed digest is sent in the
X-Sg-Signature-256header in this format:
X-Sg-Signature-256: sha256=<computed_digest>
3. How to Validate the Signature
On your server:
-
Read the raw request body exactly as received (before parsing JSON).
-
Compute the HMAC-SHA256 of that body using your webhook secret (the same one as you configured in StackGuardian).
-
Format it as:
sha256=<your_computed_digest> -
Compare your computed digest to the value in the
X-Sg-Signature-256header.- Always use a constant-time comparison function to avoid timing attacks.
-
If they match → the request is authentic.
If they don’t match → reject the request.
4. Example (Python)
def verify_signature(secret: str, body: bytes, signature_header: str) -> bool:
    """
    Verify the StackGuardian webhook signature.

    :param secret: The webhook secret token
    :param body: The raw request body (bytes)
    :param signature_header: The value of the X-Sg-Signature-256 header
    :return: True if the signature is valid, False otherwise
    """

    # Compute expected signature
    expected_hmac = hmac.new(secret.encode(), body, hashlib.sha256).hexdigest()
    expected_signature = f"sha256={expected_hmac}"

    # Ensure both are bytes for constant-time comparison
    try:
        return hmac.compare_digest(expected_signature.encode(), signature_header.encode())
    except Exception:
        return False
5. Security Best Practices
- Always validate signatures before processing the payload.
- Never log your webhook secret or include it in error messages.
- Ensure you are comparing against the raw request body, not a parsed or reformatted version.
- If you have configured a secret but the
X-Sg-Signature-256header is missing or invalid, reject the request immediately as the request might have been tampered with.
With these checks in place, you can be confident that your webhook listener only processes requests that truly come from StackGuardian.