Setup Private Runner Azure
This document provides a guide to setting up Private Runner Groups on the StackGuardian platform, focusing on configuring storage backend using Azure Blob Storage for seamless task execution within your organization's infrastructure.
Configure a Private Runner Group in Azure
Before you begin creating a private runner, make sure you have the following prerequisites set up:
1. Creating an Azure Blob Storage Account
1.1 Create Azure Blob Storage
Follow the Azure Blob Storage creation guide to set up your Blob Storage account.
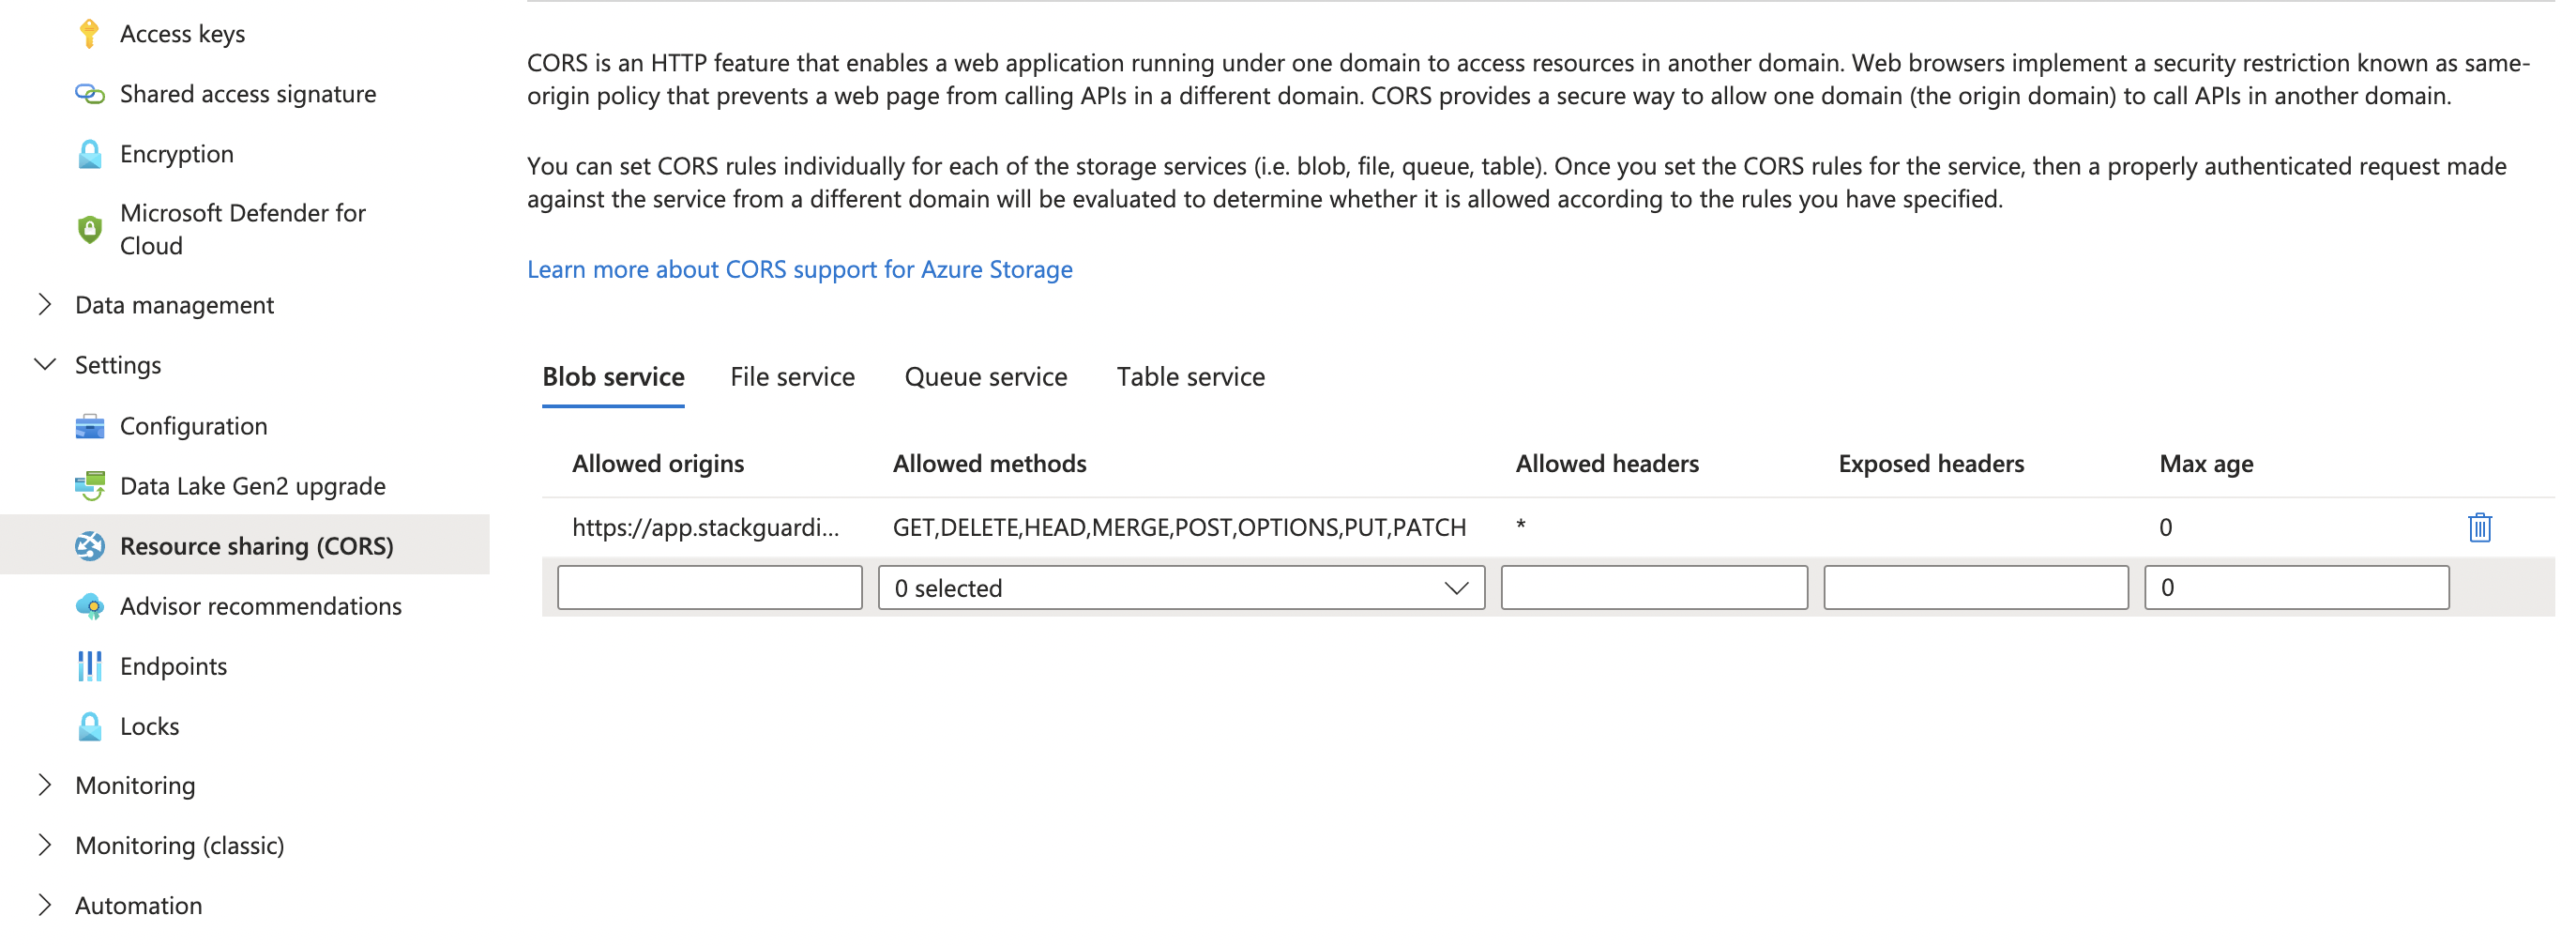
1.2 Configure CORS Policy for Azure Blob Storage:
Configure the CORS settings based on your StackGuardian region:
- EU Region: Allow all HTTP methods (GET, DELETE, HEAD, MERGE, POST, OPTIONS, PUT, PATCH) for
https://app.stackguardian.io - US Region: Allow all HTTP methods (GET, DELETE, HEAD, MERGE, POST, OPTIONS, PUT, PATCH) for
https://us.stackguardian.io
This ensures that the runner can securely access and interact with the required resources.
1.3 Create a Folder Called “runner”
Inside your Azure Blob Storage, create a new container named runner to store the necessary files and data for the private runner.
1.4 Configure access credentials
StackGuardian supports two authentication methods for Azure Blob Storage. Choose the one that fits your setup.
Managed Identity:
Assign the following roles to your managed identity on your Azure Blob Storage account:
These roles will be used later when configuring the storage backend on the StackGuardian platform for your private runner.
Access Key:
Find your access keys under Security > Networking in the left navigation bar of your Azure Blob Storage account. These keys will be used when configuring the storage backend on the StackGuardian platform for your private runner.
2. Setting Up a Private Runner Group in StackGuardian
To create a Storage backend with Azure Blog Storage Private Runner Group in StackGuardian, follow these steps:
2.1. Under Organization Settings in the StackGuardian platform , navigate to the Runner Groups section and click on "Create New Runner Group".
2.2. In the form pop-up, enter the following details:
- Resource Name: Enter a name for your private runner group (e.g., "CI/CD Pipeline Group").
- Resource ID: Auto-generated from the runner group name. You can customize it using only letters, numbers, underscores (_), or dashes (-). Resource names containing whitespace may generate unexpectedly different IDs. This cannot be changed after creation.
- Description: Provide a brief description of the group's purpose.
- Add Tag: Optionally, add tags to categorize or label the runner group.
2.3. Under "Storage Backend Configuration" dropdown, enter the following details:
- Type: Select "Azure Blob Storage".
- Storage Account Name: Enter the name of the storage account.
- Storage Account Access Key: Enter the storage account access key, which you create in the Setup Step 1.4 when creating the Azure Blob Storage.
2.4. Click on the "Create" button to create your private runner group.
Setting Up a Private Runner Group in StackGuardian
3. Creating the Virtual Machine
Private runner groups support multiple runner virtual machines and the StackGuardian platform takes care to balance the load between them. In this step, one or multiple VMs will be created that become part of the private runner group.
3.1 Requirements for Private Runner
Private runner groups support the following CPU architectures and operating systems:
| Architecture | OS |
|---|---|
| x86_64 | CentOS/RHEL 7, 8, 9, Ubuntu 20, 22, 24 Amazon Linux 2, 2023 |
The VM requirements depend on the workloads that will be running inside the workflows. Ensure that the VM meets the following minimum requirements:
| Type | Description |
|---|---|
| CPU | 4 cores |
| Memory | 8 GB |
| Disk | 100 GB |
/var Directory Storage AllocationIn a standard deployment, the 100 GB of storage is dynamically assigned, requiring no additional configuration. However, if you are utilizing multiple disks for the private runner instance, please ensure that 80 GB of storage is specifically allocated to the /var directory on the VM. This directory is crucial as it is used by Docker and other private runner processes. To maintain optimal performance, we automatically clean up unused images and containers every 4 hours. Allocating 80 GB provides a sufficient buffer to accommodate these operations.
3.2 Creating and Configuring the Private Runner
Most of the pre-required commands come built-in but you will need to install docker, crontab and jq inside the virtual machine you created using SSH. In addition, for Amazon Linux OS, gnupg2 and cronie libraries are required as well.
3.3 Registering the runner with SG platform
Once logged into the SG platform, navigate to Profile > Settings > Runner Groups, open your runner group and click the 'View' button to see the connection string starting with wget .... Use this command while logged into the VM's CLI to register your runner.
After successful registration your runner(s) will show up in the UI under Runner Instances.