Connect GCP to StackGuardian
Overview
StackGuardian offers the following options for configuring a GCP account:
- Workload identity federation (recommended)
- Service sccount
Workload identity federation
To create a connector in StackGuardian using Workload identity federation, which allows secure authentication without managing service account keys, configure the steps below on the GCP console.
- Add a New Pool
- Go to "IAM and Admin" > "Workload Identity Federation" and click on "Create Pool". This helps group related identities together, making it easier to manage permissions and access.
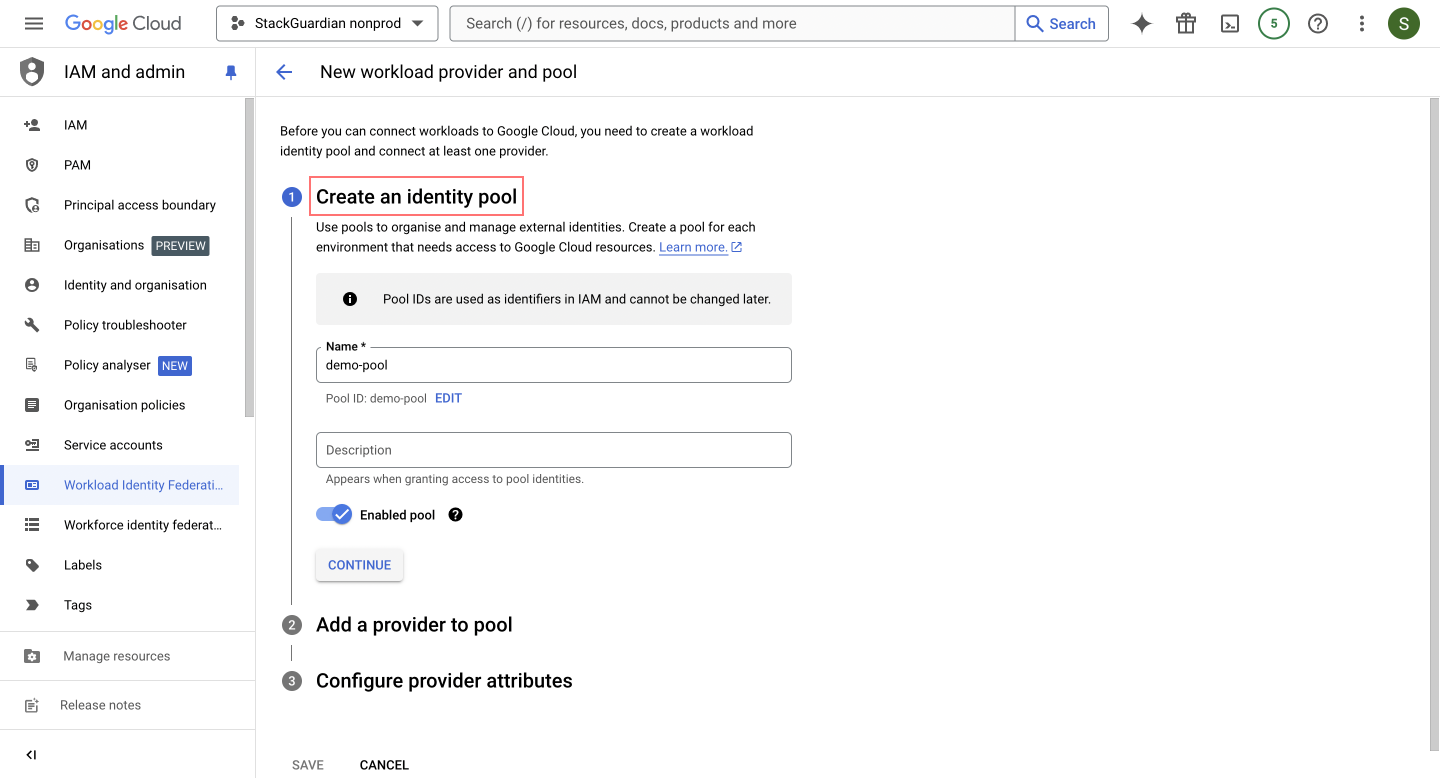
- Create an Identity Pool
- Pool Name: Enter a name for your identity pool that will contain the identity provider configurations. Click on "Continue" to proceed.
- Add a Provider to the Pool
This step links your identity provider with GCP, allowing GCP to trust the identities verified by your provider.
- Select Provider: Choose "OpenID Connect (OIDC)" from the dropdown menu.
- Provider Name: Enter a provider name, for example,
sg-test. - Issuer URL:
- For EU Region:
https://api.app.stackguardian.io - For US Region:
https://api.us.stackguardian.io
- For EU Region:
- Allowed Audience: This specifies acceptable values for the
audiencefield in the OIDC token, ensuring that only tokens meant for this audience are accepted.- For EU Region:
https://api.app.stackguardian.io - For US Region:
https://api.us.stackguardian.io
- For EU Region:
- Click on "Continue".
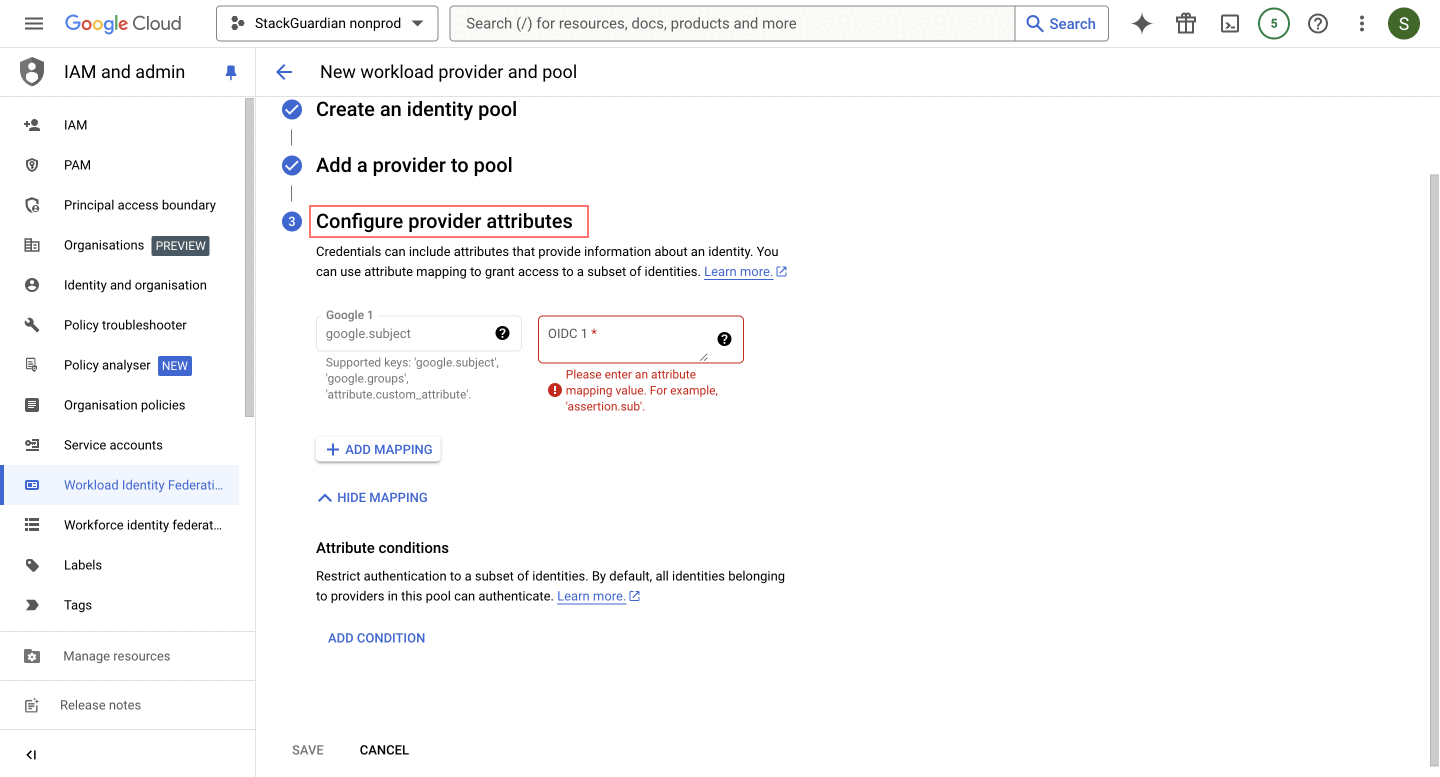
- Configure Provider Attributes
-
This configuration ensures that the subject in the authentication token maps to
google.subject, enabling seamless identity verification by aligning it withassertion.sub. -
Click on "Save".
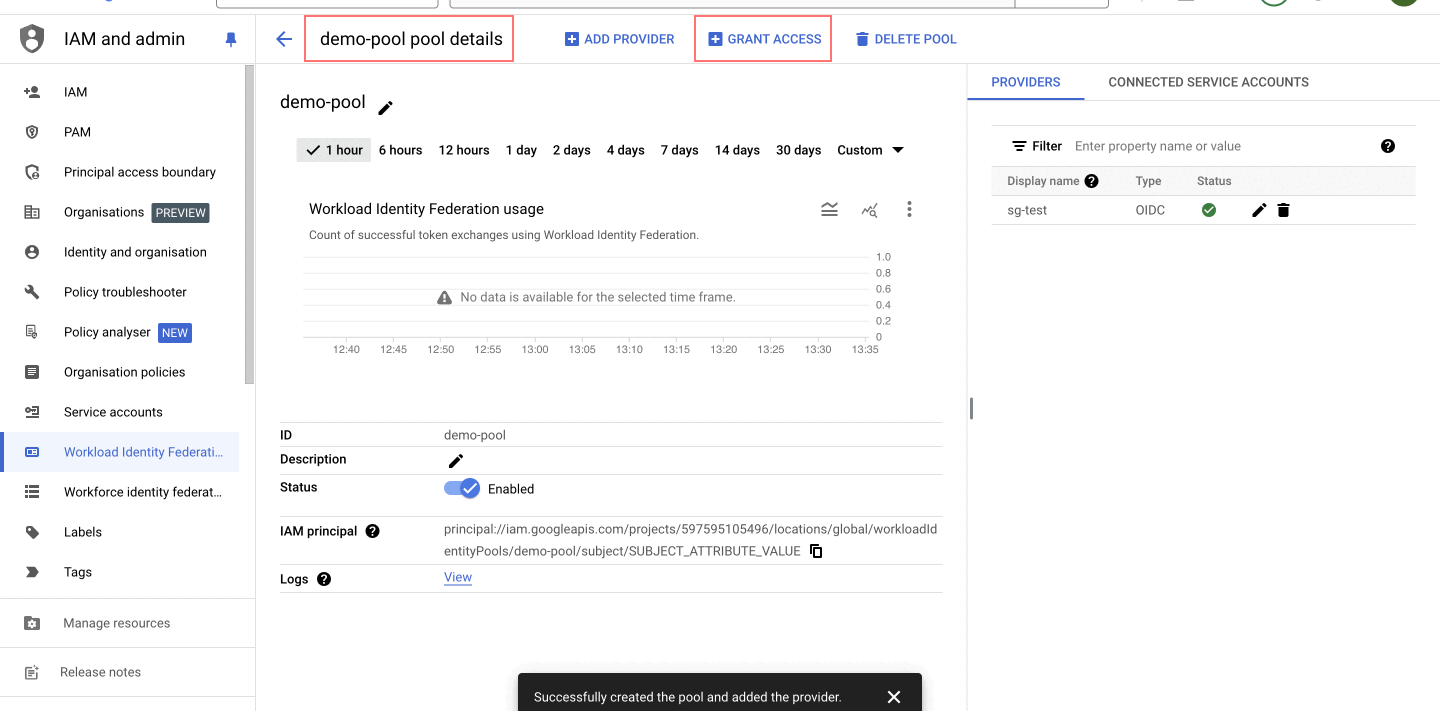
- Grant Access to Service Account
- Navigate to the newly created pool and click on "Grant Access".
- Select "Grant access using service account impersonation", allowing your workload to impersonate a service account. This gives the workload the same permissions as the service account, enhancing security by avoiding key management.
- Choose the "service account" for which principals will have the same resource permissions (e.g.,
sg-test-gcp-clara). - Select "Principals", which are identities that can access the service account. Map the subject attribute to
/orgs/<YOUR_SG_ORG_NAME>, for example,/orgs/demo-org. - Click on "Save".
- Download Client Library Configuration File
- After saving the grant access, a prompt will appear for you to select the following options:
- Configure your application, select the provider created in the previous step (e.g.,
sg-test). - Specify the "OIDC ID token path" as
/mnt/sg_workspace/user/stackguardian.oidc, file essential for ensuring that the application can communicate with the identity provider. - Click on "DOWNLOAD CONFIG" and "Save" the file, as it will be used in the next step.

This completes the initial setup. Next, finalize the configuration on the StackGuardian platform.
Finish the connector in StackGuardian
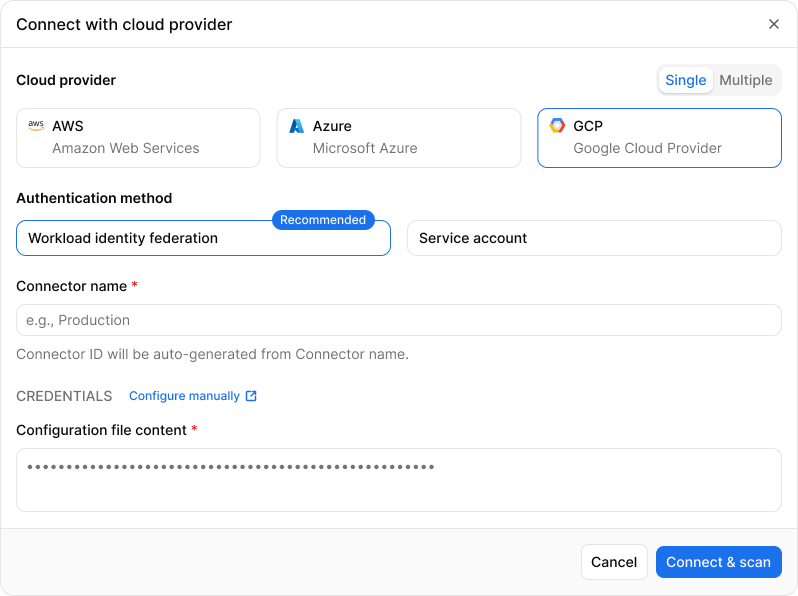
Return to the StackGuardian to finalize the connector setup:
- Navigate to Organization settings > Connectors > Cloud providers.
- Click on Connect with Cloud Providers.
- Select GCP > Workload identity federation.
- Enter the Connector name.
- In the Configuration file content field, paste the contents of the CONFIG file that was downloaded earlier.
{
  "universe_domain": "googleapis.com",
  "type": "external_account",
  "audience": "//iam.googleapis.com/projects/<PROJECT_ID>/locations/global/workloadIdentityPools/<POOL_NAME>/providers/<PROVIDER_NAME>",
  "subject_token_type": "urn:ietf:params:oauth:token-type:jwt",
  "token_url": "https://sts.googleapis.com/v1/token",
  "service_account_impersonation_url": "https://iamcredentials.googleapis.com/v1/projects/-/serviceAccounts/<SERVICE_ACCOUNT_EMAIL>:generateAccessToken",
  "credential_source": {
    "file": "/mnt/sg_workspace/user/stackguardian.oidc",
    "format": {
      "type": "text"
    }
  }
}
The downloaded configuration file will look similar to the example above, but the placeholders <PROJECT_ID>, <POOL_NAME>, <PROVIDER_NAME>, and <SERVICE_ACCOUNT_EMAIL> will already contain values specific to your setup.
- Once all information is entered, click on Connect & scan to finalize the connector setup.
Workload identity federation
Service account
Follow the steps below on the GCP console:
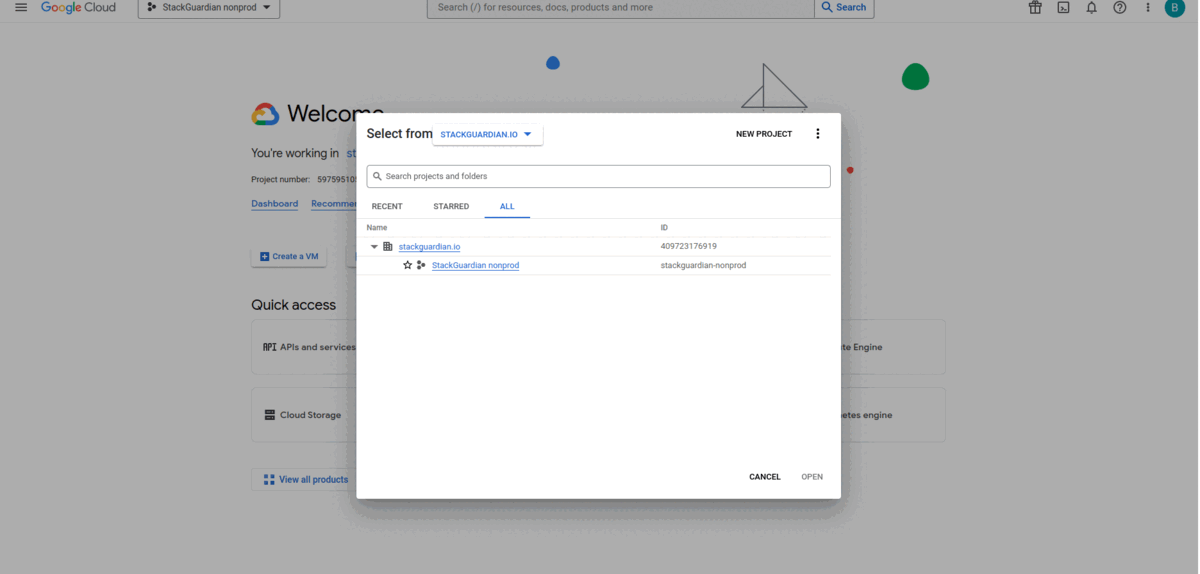
- Select the desired project from the GCP portal.
- In the side menu, go to "IAM & Admin" and navigate to "Service Accounts".
- Click on "Create Service Account" to create a new service account.
- Enter a name for the service account (e.g myapp-service-account or operations-dept-account). The service account ID will be generated automatically. Click "Create and Continue".
- In the next step, assign the desired role to the service account under "Grant service account access to the project". To grant full access, select the 'Owner' role.
- Grant user access to the service account if needed.
- Click "Done" to complete the service account creation.
- The newly created service account will initially have no key assigned to it. Click on "Actions" and then "Manage keys".
- Upload an existing key or create a new key.
- If creating a new key, select the key type in JSON format, and it will be automatically downloaded.
Google cloud platform Connector
Finish the connector in StackGuardian
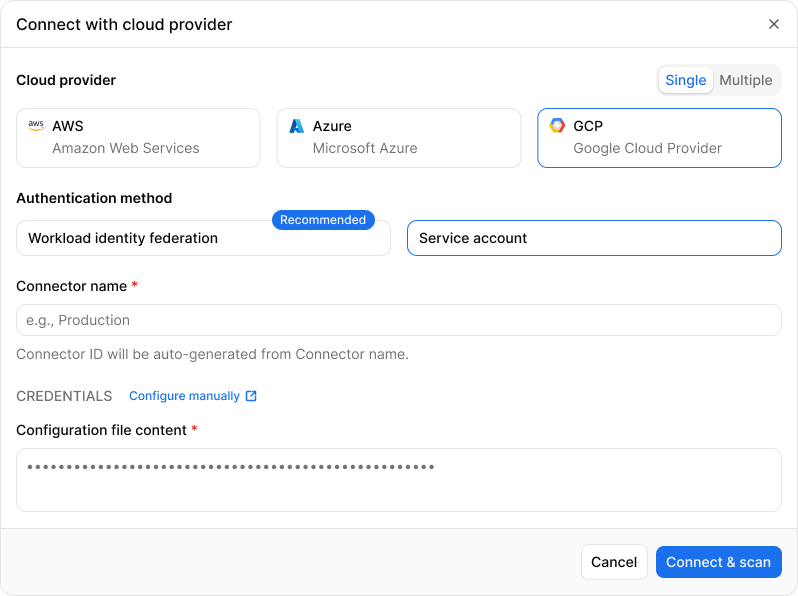
To finish the connector on StackGuardian platform:
- Go to the Organization settings > Connectors > Cloud Providers.
- Click on Connect with Cloud Providers and select GCP.
- Select Service account.
- Provide the Connector name.
- In the Configuration file content field, paste the contents of the JSON key file that was downloaded earlier.
- Click Connect & scan to finish the connector.
Service account