Dev Portal
Overview
The Dev Portal provides a streamlined interface for developers to deploy cloud resources using subscribed templates. Select a template from those available to you, configure the parameters your platform team has exposed, and run the Workflow, all in a controlled environment. This ensures consistency and security while platform teams maintain governance over infrastructure.
To get started, open the Orchestrator and select Dev Portal from the sidebar. Here's a quick overview of the Dev Portal in action:
How to create a Workflow/Stack
To create a Workflow/Stack via the Dev Portal:
- Search for a template in the Search bar.
- On the template card, click Select.
How to select a Template
The Workflow/Stack will be configured in three steps:
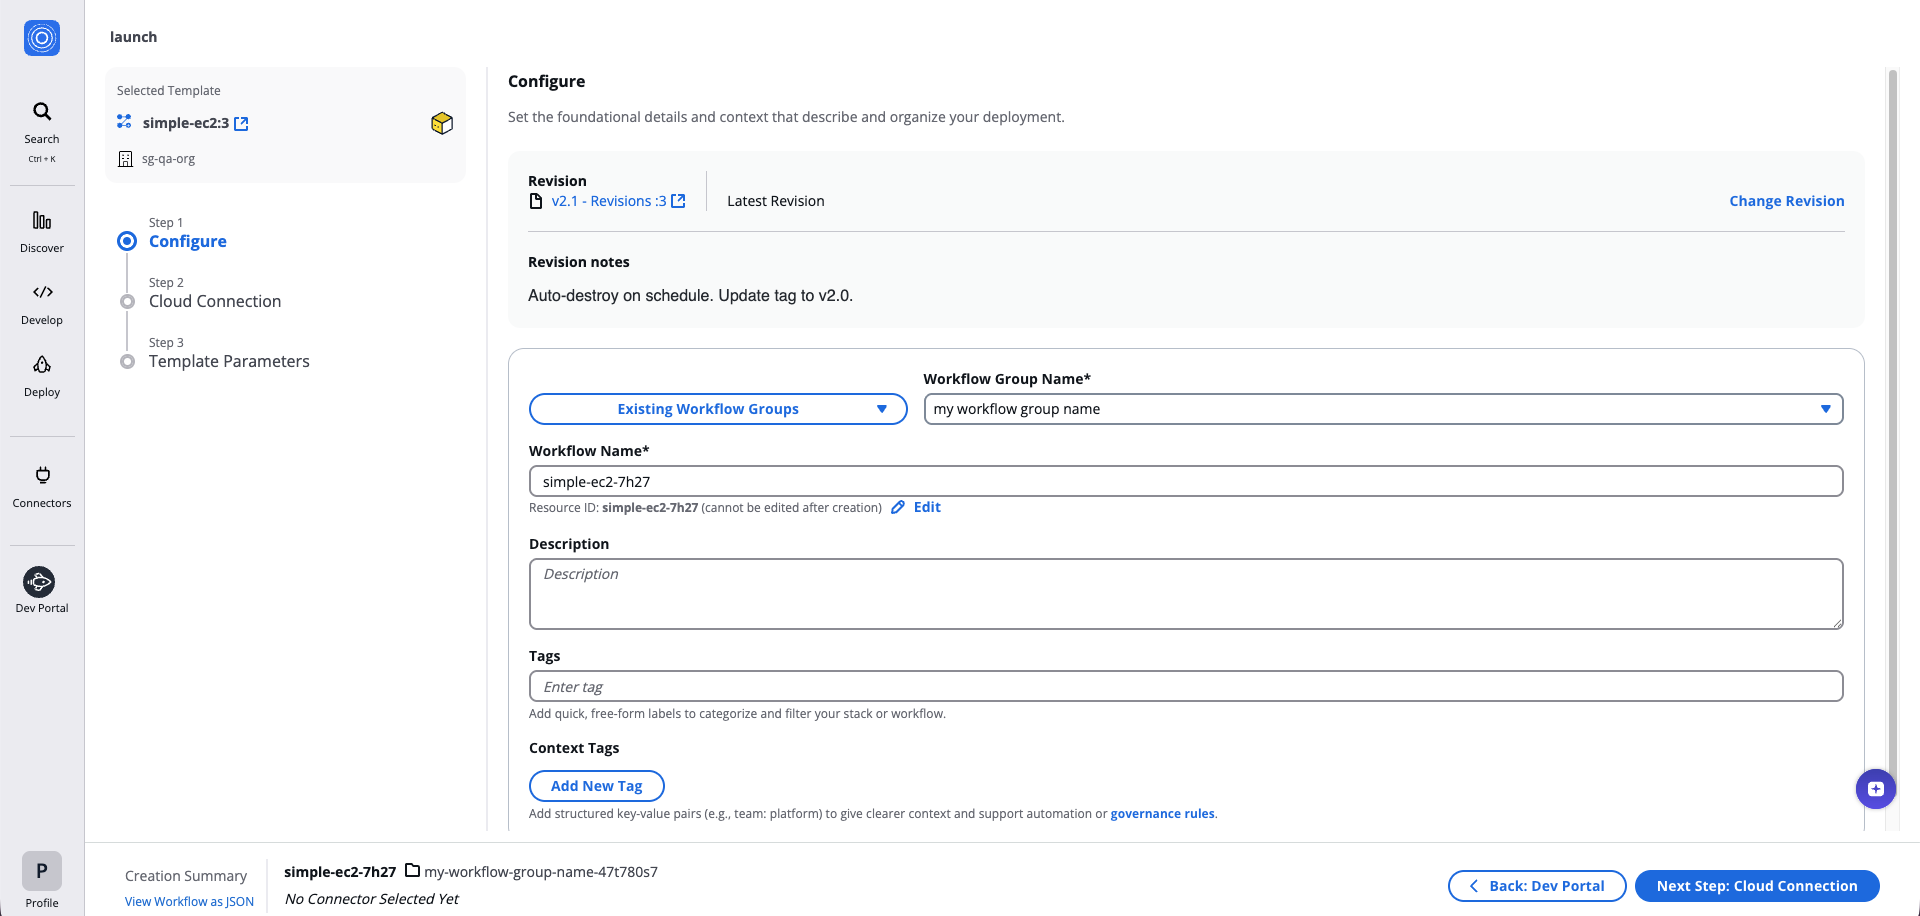
Step 1: Configure Workflow/Stack meta details
- Fill in the following fields:
- Revision: Each template version is tracked as a revision. The Revision notes contains information about the latest revision, which is selected by default. Click Change Revision to select a different revision.
- Workflow Group Name: Select an existing Workflow Group or create a new one (the most recently created is selected by default).
- Workflow Group ID: Auto-generated from the Workflow Group Name. You can customize it using only letters, numbers, underscores (_), or dashes (-). This cannot be changed after creation.
- Workflow Name
- Workflow ID: Auto-generated from the Workflow/Stack Name. You can customize it using only letters, numbers, underscores (_), or dashes (-). This cannot be changed after creation.
- Description: Add a short description (e.g., Creates EC2 key pairs on AWS).
- Tags
- Context Tags
- Click Next Step: Cloud Connection.
How to configure Workflow meta details
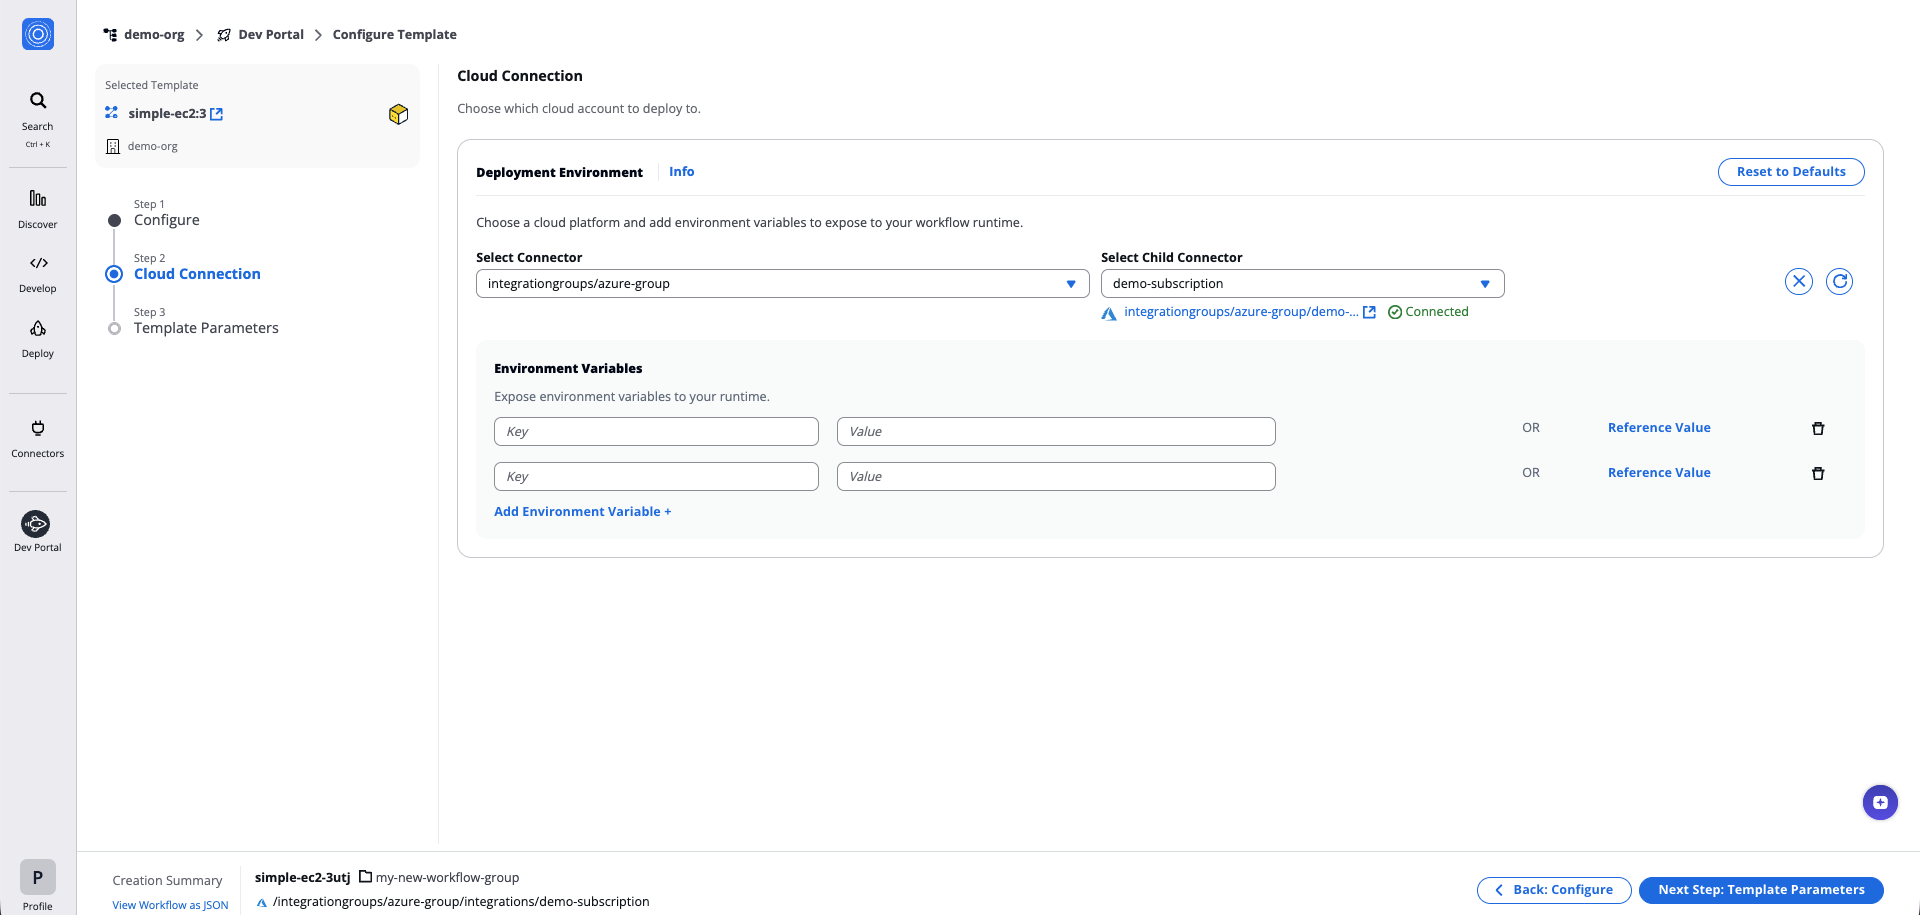
Step 2: Cloud Connection
- Select a pre-configured Connector.
- Select a Child Connector.
- Configure your runtime environment:
- Add Environment Variables, or
- Select Reference value to use outputs or Vault Secrets from another Workflow or Template.
- Click Next Step: Template Parameters.
Connectors details
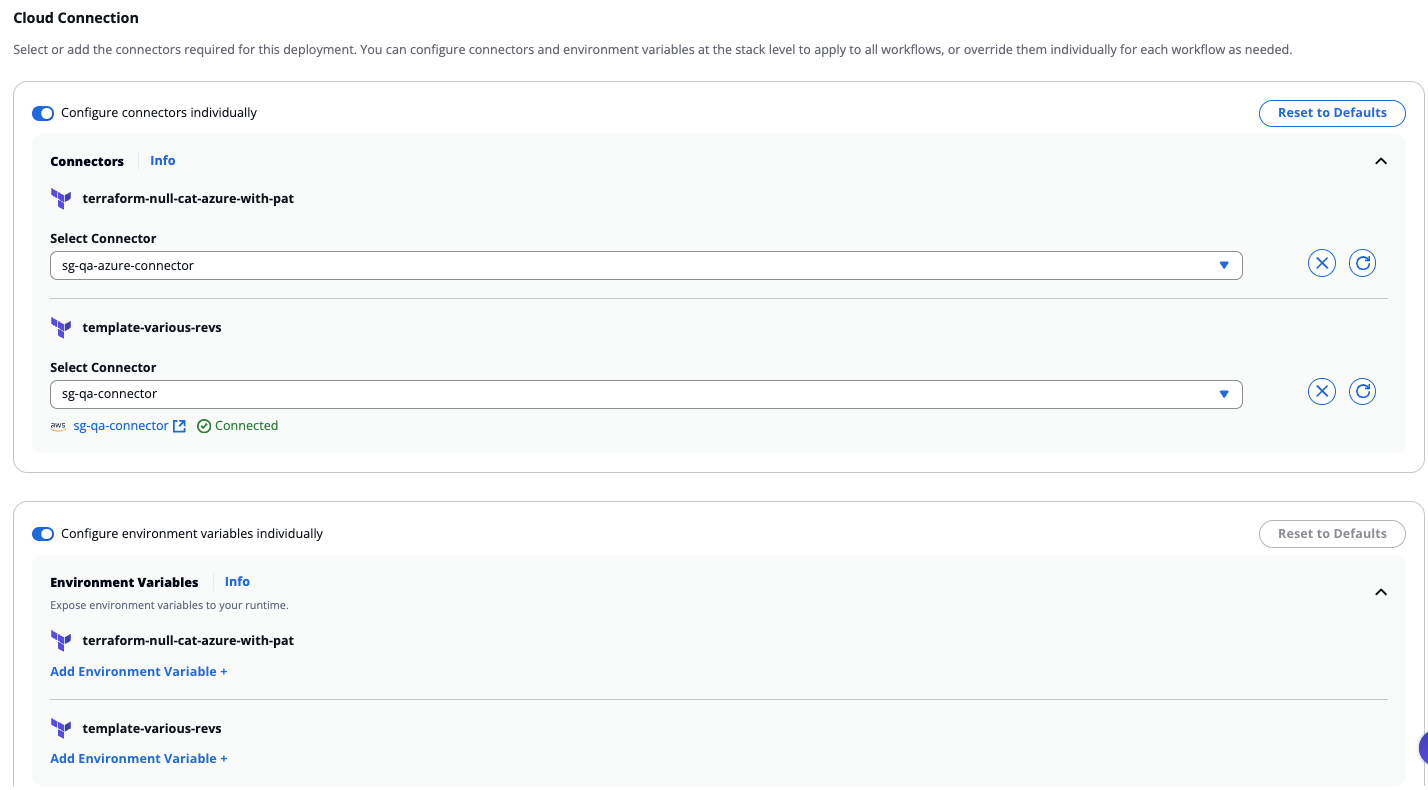
When creating a Stack, you can enable Configure connectors individually to set different connectors for each Workflow in the Stack. You can also enable Configure environment variables individually to set different environment variables for each Workflow. When disabled, all Workflows share the same configuration.
Individual configuration per Workflow
Step 3: Template Parameters
- Fill in the main parameters and step-specific parameters for your selected Template.
- Click Next Step: Create.
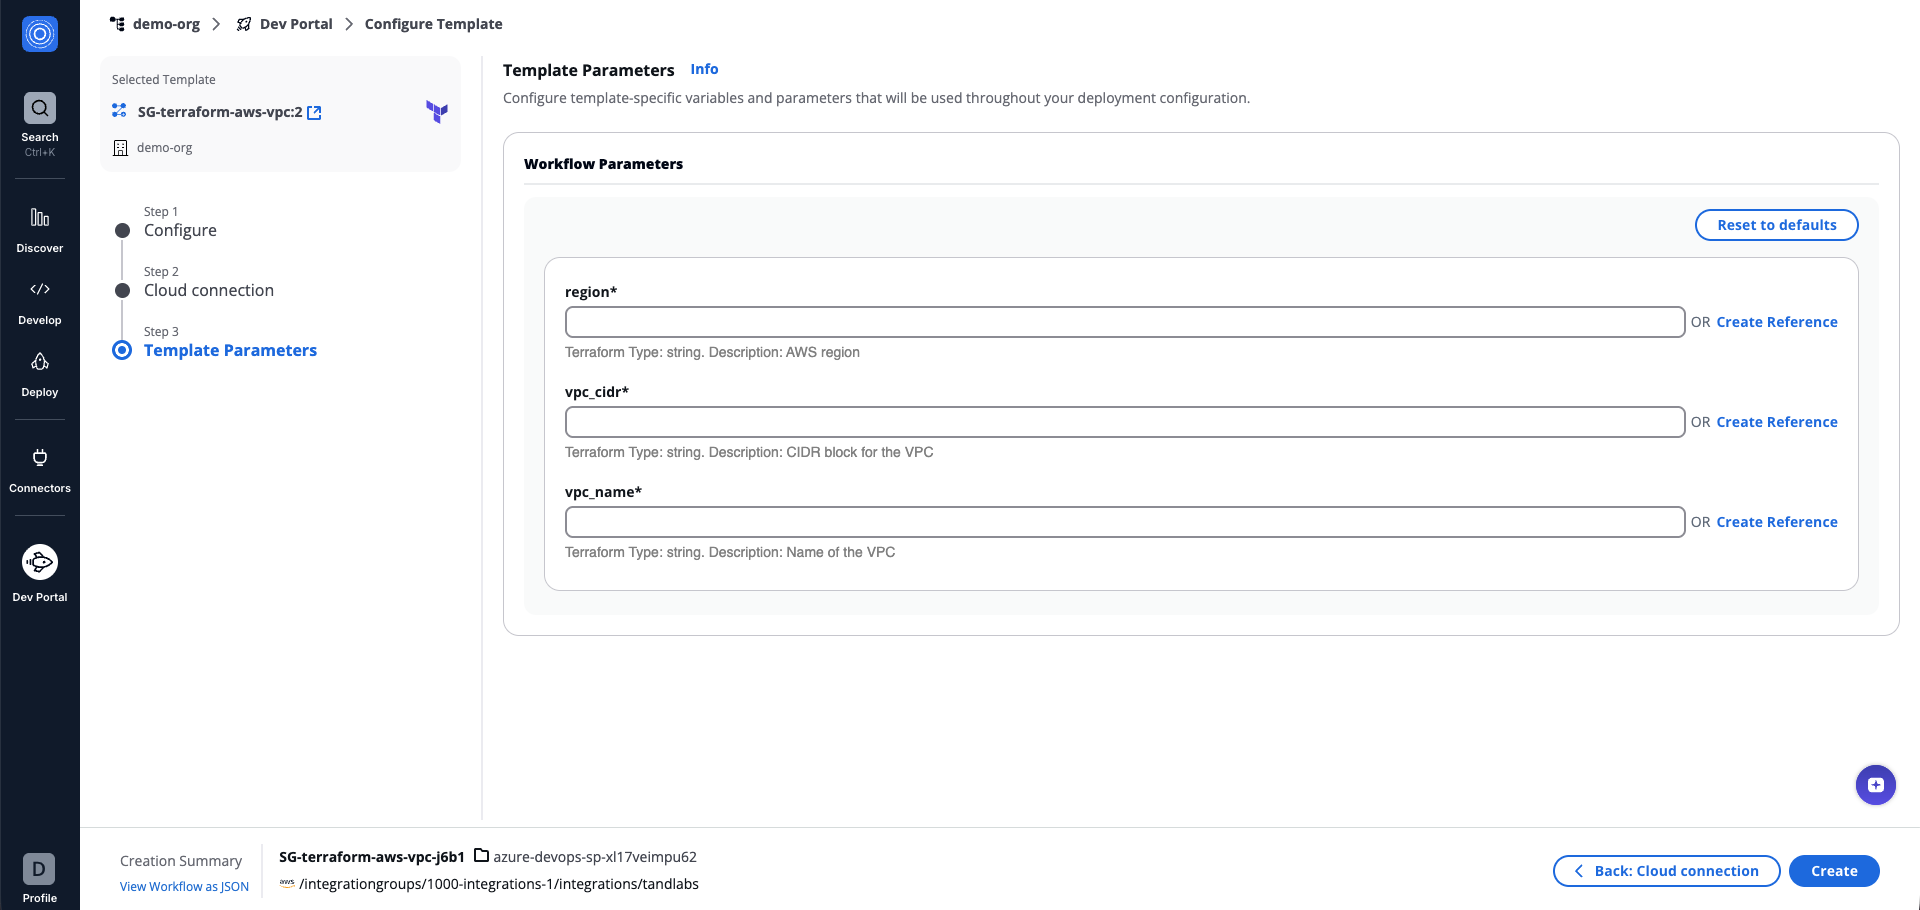
Template Parameters details
When creating a Stack, you can enable Show All Parameters to display all Workflows in the Stack, including those with non-configurable parameters to configure.

Show All Parameters
- The Workflow/Stack will be created. Click Go to Settings for additional configuration, or Run Workflow to run it straight away.
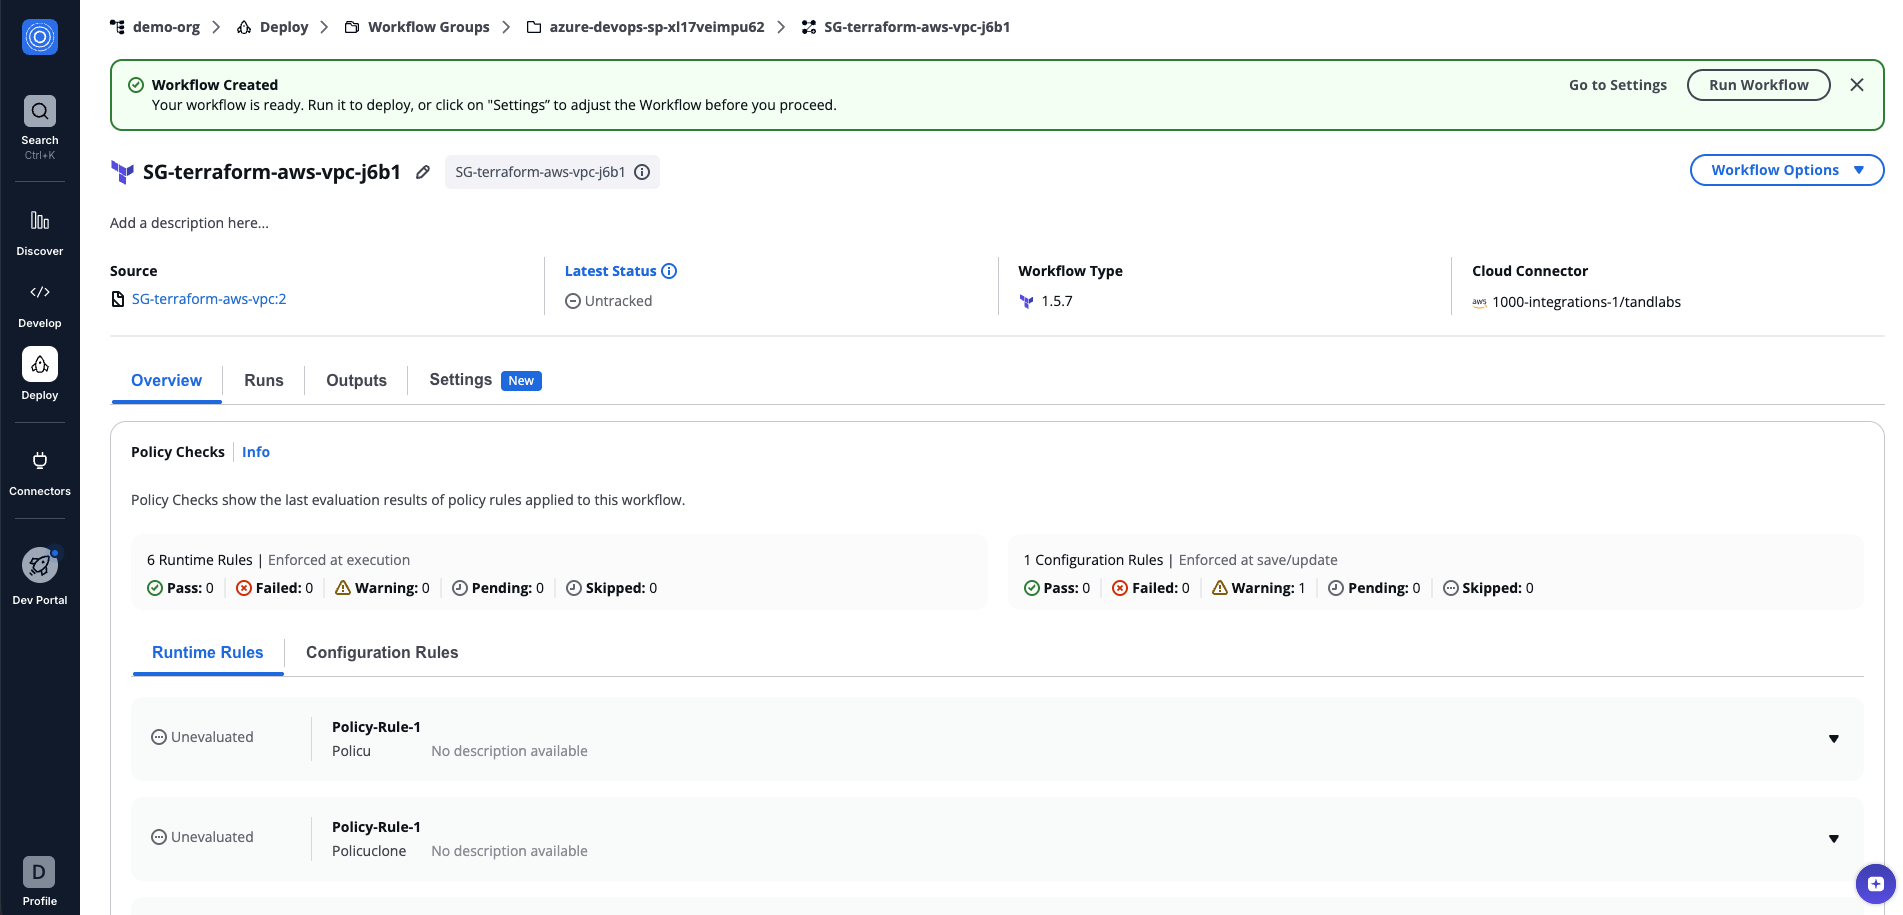
Workflow Run created
Once the Workflow is created, you can continue configuring it through Workflow Settings or run it straight away.
View Workflow as JSON
During the creation process, you can view the JSON representation of your Workflow/Stack configuration. This is useful for creating or managing Workflows/Stacks with external systems and automation tools such as the StackGuardian API, ServiceNow, and others.
Click on View Workflow/Stack as JSON in the bottom-left corner of the screen, inside the Creation Summary.
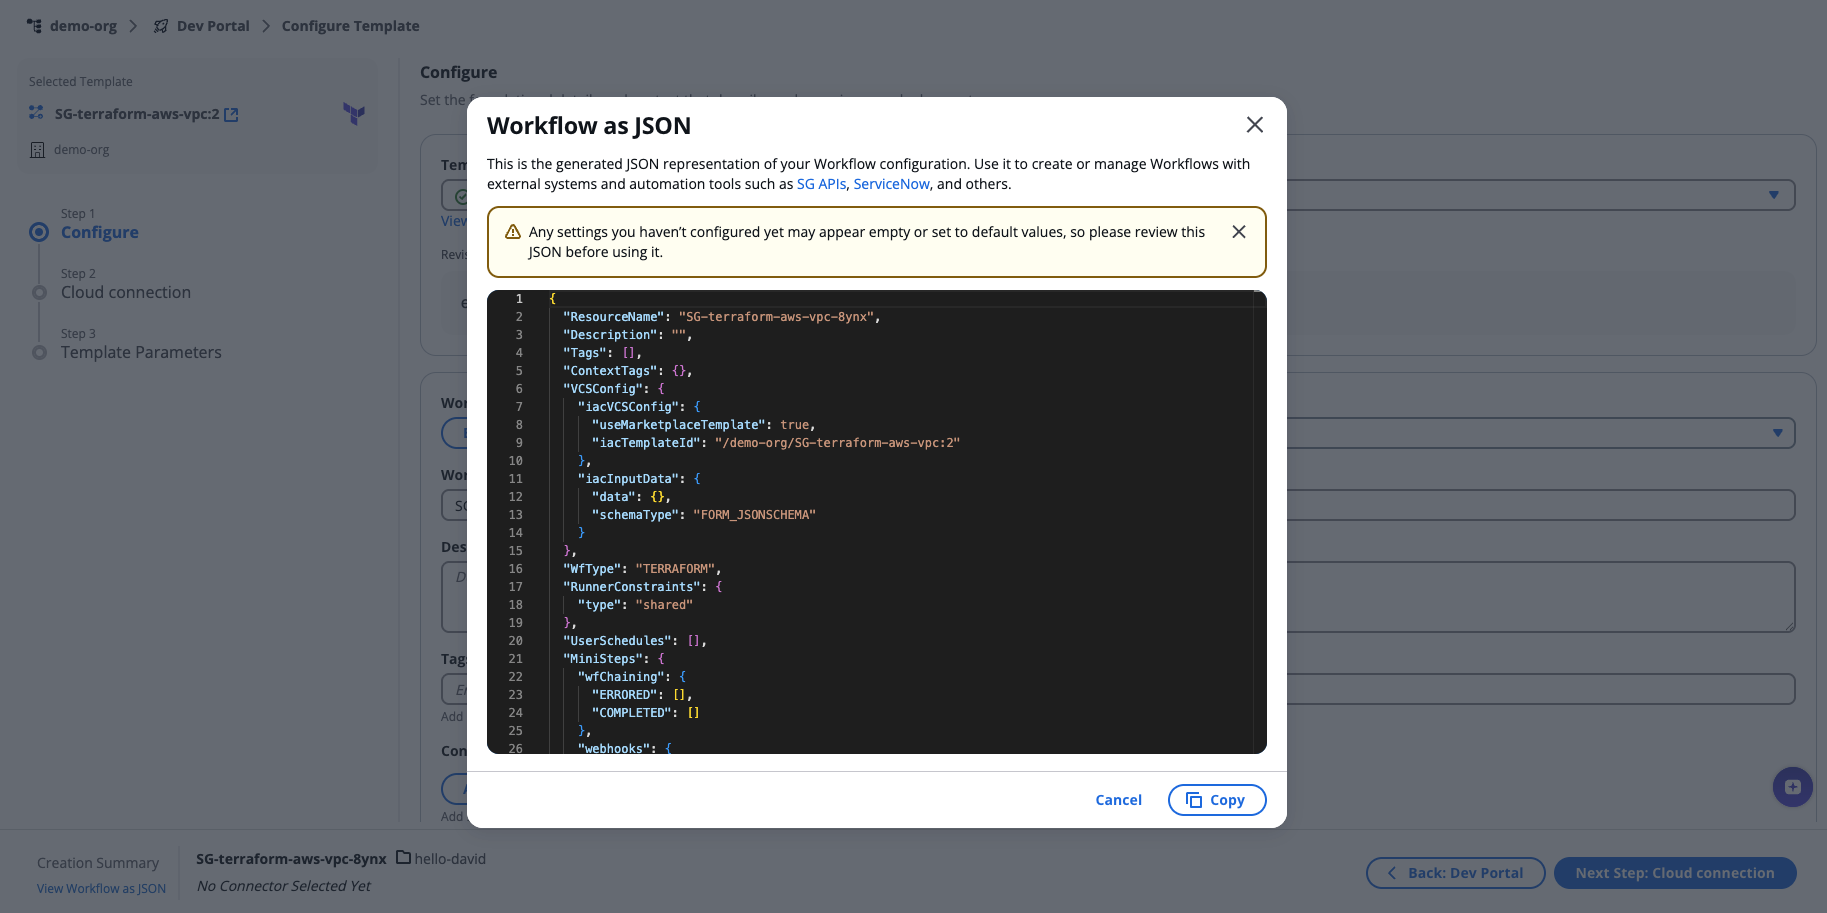
Workflow as JSON
Settings you haven't configured yet may appear empty or set to default values. Review the JSON before using it.
Create from Git
The Dev Portal allows you to deploy directly from a Git repository instead of using a pre-configured template. This option is ideal when you want to deploy your own infrastructure code.
To get started, open Orchestrator, select Dev Portal from the sidebar, and click Use Git.
Use Git
After you click Select on your chosen infrastructure type, the Workflow will be created in three steps:
Step 1: Configure
Name your deployment and choose where to save it.
- Fill in the following fields:
- Workflow Group Name: Select an existing Workflow Group or create a new one (the most recently created is selected by default).
- Workflow Name
- Description (optional): Add a short description.
- Tags (optional): Add labels to help find this deployment later.
- Context Tags (optional): Add structured key-value pairs for automation or governance rules.
- Click Next Step: Git Repository.
Step 2: Git Repository
Connect your repository and choose the code to deploy.
- Select a Version Control provider (GitHub, GitLab, etc.).
- Enter or search for the Repository URL.
- Optionally, expand Advanced Options to configure:
- Branch, Tag or Commit: Specify the branch, tag, or commit to deploy (default:
main). - Working Dir: The folder in your repository containing the code to deploy.
- Git Sparse Checkout Config: Download only specific folders from your repository.
- Enable git core.autocrlf: Enable automatic line ending conversion.
- Branch, Tag or Commit: Specify the branch, tag, or commit to deploy (default:
- Configure Template Parameters if your deployment requires input variables:
- Select an Input Variables Methods option to define how values are passed to your deployment.
- Click Next Step: Connectors.
Step 3: Connectors
Choose which cloud account to deploy to.
- Select a pre-configured Connector.
- Select a Child Connector.
- Configure your runtime environment:
- Add Environment Variables, or
- Select Reference Value to use outputs or Vault Secrets from another Workflow or Template.
- Click Create.